Destiny The Taken King - How to Get the Sword Quest
Posted in
destiny
With the many quests now available in The Taken King it can be a daunting prospect trying to decide which one to start next. In particular, the sword quest is one of the most rewarding but is certainly well hidden among the others.
In this guide you'll find simple step by step instructions for unlocking the important quest which guarantees a sword reward at the end of it. So follow along and claim your first Sword heavy weapon in Destiny.
Video Walkthrough: if you prefer a video guide then see the link below, otherwise keep reading for the full text guide...
 Walkthrough video (Legendary sword)
 Step 1 - Complete "Taken King" Quest
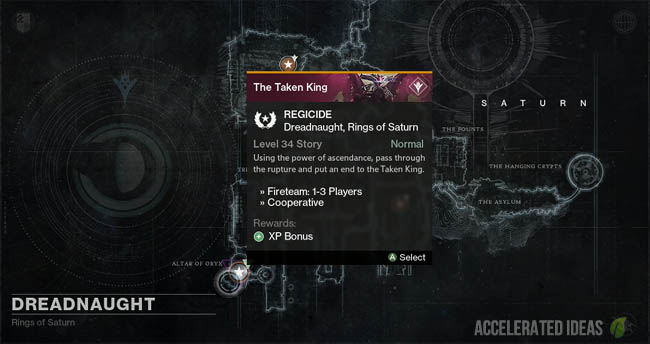
The first and possibly longest quest line is for the Taken King which takes you on a journey to Mars, Earth, the Moon and finally all the way to the new Dreadnaught to take on and defeat The Taken King.
In total there are 6 missions for this quest line with a handful of character interactions, shown below:
- Cayde's Stash (Earth)
- The Dreadnaught
- Talk to Cayde-6 (Tower)
- Talk to Zavala (Tower)
- Enemy of my Enemy (Dreadnaught)
- Talk to Eris (Tower)
- Lost to Light (Moon)
- Talk to Erid (Tower)
- Talk to Cayde-6 (Tower)
- Promethean Code (Earth)
- Regicide (Dreadnaught)
Once you've completed the final mission called Regicide (where you defeated Oryx) you probably have the following missions in your inventory:
- The Taken Wars: Venus
- The Vanguards Hand
- Crucible Forged
- Path of the…
- Fruit of the Garden
It's now safe to move on to Step 2 below.
Step 2 - Complete "The Vanguards Hand" Quest
![Vanguards Hand quest]()
Take a peek at the quests in your inventory and spot the one titled "The Vanguards Hand". This quest line starts with a mission in the Dreadnought to establish patrol routes and beacon sites for the Vanguard.
Thankfully this is actually a fairly quick and rewarding mission which earns you 25 Legendary Marks for not much work. After a short chat with Cayde-6 in the Tower, several other new quests will be unlocked and the most important of these is described in Step 3 below.
The conclusion to this quest is a new map unlock - "Dreadnought patrol" area in addition to some nice Legendary Marks.
Step 3 - Speak to Eris
![Eris quest]()
Now that the above quests are out of the way it's time to talk to Eris Morn, located just next to the Vanguard mentors. She'll offer you a couple of quests but the most important of these is A Broken Will which takes you on a journey to the Dreadnaught to find Hadium Flakes, required to reforge a blade.
It's worth accepting all the other quests anyway, especially the one which takes you to the new strike called Sunless Cell which is really great strike.
Step 4 - Start the "Broken Will" quest
![Broken Will quest]()
For now, speak with Lord Shaxx to commence the first step of the Broken Will quest - "Reforging the Blade".
Immediately hover over the quest description and take note of the rewards. Notice the Legendary Weapon reward? Yep, that's the one we're after and it's going to be a guaranteed sword weapon.
It's time to head off to the Dreadnaught once again, but this time in Patrol mode to search for these Hadium Flakes that are found in chests which randomly spawn. These chests are exactly like the material chests from other planets and the technique to acquire Hadium Flakes is exactly the same.
Work circles round the edge of a Patrol area e.g. Hull Beach until you come across little caverns. Inside these caverns you'll sometimes come across chests with green lights on them. Open the chest to collect a Hadium Flake or two and move one step closer to the target of 25 flakes necessary to complete this quest step.
If you're having trouble, here's a quick video for the circular farming route:
Dreadnaught farming route As soon as you open a chest, another one will spawn at another location. Should you find yourself in the company of other guardians remember to point, dance or do something to call their attention...they may be looking for chests too.
Step 5 - Claim Reward
![Sword choice]()
As soon as hit the 25 mark for Hadium Flakes, jump to orbit and set the Tower as the next destination. Visit Lord Shaxx and claim your free Legendary sword, which can be one of the following three:
- Arc Edge
- Sol Edge
- Void Edge
All three swords are attack 220 and require Level 30. Depending on the primary damage type, the guard stance will be effective against the opposite damage types. For example, if you choose Void Edge, you will deal Void damage but your guard will be beneficial against Solar and Arc. Therefore, choose wisely based on your new subclass and other weapons you may use frequently.
Step 6 - Exotic Sword Upgrade
![killing Ecthar, Sword of Oryx]()
Now that you've got the Legendary sword you can happily choose to keep that weapon, or you can go one step further and upgrade it to an Exotic. Once again, a Quest line will guide you through the process of obtaining the elusive weapon. Before you start this quest please bare in mind that it's one of the most time consuming quests in The Taken King, taking around 5-6 hours to complete.
In order to kickstart the process you first need to fully upgrade your chosen sword and also Infuse it up to at least 280 (this will require at least two high level heavy weapons). As soon as the sword reaches this stage, a new quest becomes available from Shaxx called "A Sword Reforged".
It's time to get serious now because this quest is very difficult. I've listed the steps to complete the exotic quest below, but please be aware that killing Ecthar, Sword of Oryx is difficult and requires very quick reactions in order to open the door. Secondly, collecting rare planetary materials is extremely time consuming. You can expect to spend 2-3 hours on this part alone.
- Kill 50 majors and 25 players in crucible using the sword
- Kill Ecthar, Sword of Oryx
- Collect rare planetary materials (approx 300 standard materials to get enough rares, related to your sword type e.g. Helium Filaments)
- Get hundreds of Ability kills (Melee, Grenade, Super) using the swords damage type
- Speak to Shaxx
- Wait for Armsday
- Complete the Sunless Cell strike: killing BOSS and Wardens in 30 seconds
Here's a quick overview of each of the quest steps:
Exotic Sword quest overview How to Find and Kill Ecthar, Sword of OryxThis is one of the hardest parts of the quest (if you don't understand the mechanics) so follow these instructions:
- Go to the Dreadnaught (patrol)
- Sprint towards the cabal ship and take the passage underneath the ship, at the back right of the ship (see video below)
- Follow the route into the Mausoleum
- Head to the far left side of the room and enter chamber
- Follow the passage, drop underground through the hole and head slightly right
- Keep going as you do a 90 degree right turn, then head upstairs
- Kill the 3 warden knights in quick succession using a single Super (tip: lower their health first, then kill them all at once)
- Door will open, enter Asylum
- Kill enemies in the room to make Ecthar spawn in
- Kill Ecthar using your sword and any weapon (sword is only required to drop shields)
Video guides:
How to find The Founts (3 knights location) on Dreadnaught How to open the door to Ecthar Sunless Cell StrikeThe final part of the Exotic quest is to complete the Sunless Cell strike and kill the Wardens and BOSS within 30 seconds of each other. A matchmaking facility is available for this strike, although the recommended difficulty is a high 300. A similar tactic to the Ecthar encounter applies here: knock down the Wardens health then focus on the BOSS until he's almost done. Switch back and kill the Wardens first then finish off the BOSS to avoid Wardens despawning. This should give you a better chance at achieving the 30 second window.
Ideally, you want a fireteam of players going for the same sword type. This will mean that you ONLY need to keep one of the Wardens alive whilst killing off the others. The one you keep is the warden with the same shield as your sword damage type. E.g. for void sword, keep the warden with purple shield alive until last possible moment (see the video for walkthrough).
Exotic Sword Quest - Final Step (Sunless Cell Strike) The Exotic reward will be one of the following and you still keep your legendary version. In my case I got the Void version called Dark-Drinker which has a whirling AoE attack.
- BOLTCASTER from Arc Edge
- RAZE-LIGHTER from Sol Edge
- DARK-DRINKER from Void Edge