Destiny The Taken King - Kings Fall Raid Guide
Posted in
destiny
The Kings Fall Raid is now live and with a recommended Light Level of 290 you're going to be in for a real challenge to get through this one. In this guide I'll be posting a walkthrough for each of the Raid sections including the Warpriest, Golgoroth, Ir Anuk Sisters and of course Oryx, the final boss.
Preparation
The recommended level for the normal raid is 290, a fairly steep requirement but none the less still doable if you're using the right strategy. In case you missed my other post about reaching 300, I suggest you have a quick read of that first if you're below 290. Here's the link:
Reaching Light 290+Numbers wise, I'd suggest running with the full fireteam of 6 because the raid includes the usual totem puzzles where the team needs to split and defend positions while a buff is passed between players. It also means that you can increase your DPS because of simple mathematical advantages.
Guardians that run with Titan Defender and Hunter Nightstalker are the most useful for this raid thanks to the Weapons of Light bonus from the bubble but also the Void bow super which can be used from a safe distance. Warlocks with self-rez are always helpful so fill the rest of the team with these to compensate.
1. Open the Portal
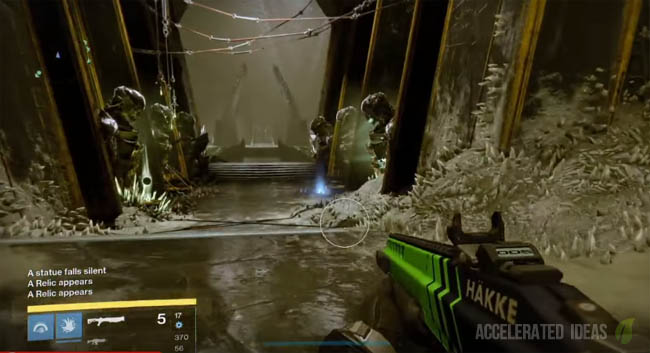
A fairly simple starter for the Kings Fall. Players need to pick up two relics (at the back of the room) and bring them to the tombs (statues) to be sacrificed; a similar process to the Court of Oryx method to spawn in a Public Event. Several Relic's have to be sacrificed before the portal appears allowing players to move onto the next section.
With a full team, split into pairs, with two going back left and two going back right. The other two stay in the hallway to provide cover fire. Make sure you provide cover for the team to ensure the two orbs are sacrificed at the same time.
When a Relic is placed successfully a message will appear saying:
"A statue hums with dark energy"If all Relics are placed successfully another message will appear:
"A Portal is open"At this point, rush to the portal and all jump through. You'll be transported to another room and your first chest reward will appear. It's only class armour or Moldering Shards at this stage though.
2. Jumping Puzzle
![jumping puzzle]()
Your classic jump puzzle is up next, this time involving swinging cylinders, transcending platforms and disappearing ones. There's not much advice I can give for this part of the Raid; you're either good at jumping puzzle or your not!
3. Kings Fall
![Kings Fall]()
A tricky annihilator puzzle that requires good coordination from all team members. The mission objective at this stage of the Raid is to "Power the Glyph". The key is to take note of the order of the buffs and their importance. The sequence is as follows:
- No buff
- Brand of the Weaver
- Deathsingers Power
To shift from no buff to Brand of the Weaver, a player has to touch the glowing ball, then immediately move from their position to the annihilator totem and hold their ground. A countdown timer will appear next to Brand of the Weaver and the player has to wait for 30 seconds for it to wear off.
Now move quickly to the Door room and stand on the charge plate. Your new buff should be Deathsingers Power and with this buff you can successfully charge the door. The charge progress is shown by little glyphs on the door itself.
Repeat the process above, with every player following the sequence from no buff until the Deathsinger's Power which helps charge the door plate. It'll take several charges before the door eventually opens. Anyone not standing on a plate during the critical annihilator totem phase will jeopardise the entire fireteam and cause a wipe.
Once all of the glyphs have lighted up on the door, the following message will appear:
"The warpriest deems to worthy"Another chest reward awaits, this time a Legendary Ghost Shell and Moldering Shards are possible loot rewards.
4. Warpriest
![Warpriest]()
A similar method applies to the Warpriest as the previous section. First, kill the Ultra's in the room to start the glyph sequence then assign a lead player to scout for glyph locations. Players must stand on their corresponding plate when their turn comes up. A message will appear saying:
"Glyph sequence started"If players fail to stand on the correct plate the sequence is broken and a message appears saying "Initiate Rejection" and the entire team wipes. It's therefore important that the plates are stepped on in the right order.
At some stage a red aura (bubble) will appear around a player called "Aura of the Initiate". Players can huddle inside the bubble and in this state will be able to damage the Warpriest. However, the aura players health starts to diminish when in this state and the only way to top it up is to kill Thralls.
Every time a player gets the red aura, they need to kill 5 Thralls for the effect wear off, otherwise face death. A good tactic is to kill 4 Thralls immediately, focus fire on the Warpriest and then finish the 5th Thrall when health is critically low. This provides maximum DPS while the buff passes between each of the players.
If the priest is damaged enough another message sometimes appears saying:
"The warpriest calls upon the Oculus"Players need to stay well away from the priest and hide behind the pillars until the bright glow wears off. Now repeat the process to slowly kill off the Warpriest and move onto the next stage.
Rewards from this stage include Raid weapons and armour, Exotic Engrams, Runes and Moldering Shards.
5. Golgoroth Maze
![Golgoroth Maze]()
A fairly simple maze run, follow the route described below:
- Run to the end of the first passage, take a right turn before the blocked door
- Straight run for 10 seconds, then take a left turn
- Straight run for another 10 seconds, then left turn
- Straight run for another 10 seconds, then right turn
- Straight run until the end
6. Golgoroth
![Golgoroth]()
After passing through the door following Golgoroth's Maze you'll enter Golgoroth's Cellar; from here it's a fight against the spider like creature called Golgoroth. This is an intense and prolonged battle but the mechanics are fairly simple once you know what to do.
It's probably best to clear the mobs from the room first before engaging with Golgoroth, this will buy you some time to concentrate on the BOSS himself.
The key to defeating Golgoroth is to distract him by focusing his Gaze onto a particular player. The player that attracts Golgoroth's Gaze has to carefully fend off Golgoroth's attacks to avoid the whole team having to wipe. During this phase, the following message appears:
"Golgoroth focuses his rage"The rest of the fireteam now shoots down an orb of water and passes into the goo to receive a buff called:
"Pool of Reclaimed Light"Stay in the pool and inflict as much damage as possible on Golgoroth with heavy and high impact weapons, targeting the weak spot on his belly.
Repeat these steps until the BOSS is dead to claim a nice reward of Raid Armour and Moldering Shards.
7. Daughters of Oryx
![Daughters of Oryx]()
The key to completing this section is to pay attention to the four platforms: front left and right, back left and right. Give them a number to help co-ordinate the team.
A Relic will appear above one of the platforms (highlighted with a white marker) and one of the team will be torn between dimensions. This player becomes the "jumper" and plays a crucial role in taking down the sisters shields.
Take note of the platform below the Relic, this will be the last platform you jump on in sequence. So starting counter clockwise, each player (x 4) needs to jump (and stay) on a platform one at a time, ending with the platform below the Relic. Once a player lands on a platform, they must not jump or leave it yet.
As soon as the first platform is stepped on a countdown timer for 60 seconds will appear with the following message:
"Hymn of Weaving"
Once you have a player on each of the platforms, a second set of new platforms will appear above. The 5th player in the team, the "jumper", now needs to jump anti-clockwise (in a similar manner) to reach the Relic. Simply touching the Relic platform is enough to gain the buff, then it's time for the "jumper" to head to the sister which is NOT singing (no red mist) and take her shield down.
At this point, the entire team then gathers together and opens fire on the sister to take her health down as much as possible. Once the timer runs out a blinding light appears and all players must be close to the "jumper" to stay safe. The following message appears in this state:
"Aura of Unravelling"
The entire sequence now starts again, with another random "jumper" being selected and a Relic appearing above a different platform. Repeat the steps above, this time slightly faster because the 60 second countdown starts immediately.
8. Defeat Oryx
![Oryx - The Taken King]()
The final part of the Raid is of course a fight against Oryx - a truly massive beast!
A methodical cycle is required to kill off the final boss, with a similar mechanic to the Daughters of Oryx section. Follow the steps below and repeat until the big guy is downed for good.
- Wait for Oryx to slam one of the platforms
- Jump on the platforms in an anti-clockwise direction (same as Oryx's Daughters section earlier); 1 player per platform
- Kill off the Lighteater Ogres that appear next to each platform
- Relic runner grabs the Relic up above
- Relic holder smashes the Knight in the middle to drop shields
- Other team kills the knight as quickly as possible
- Wait for Oryx's chest to light up and then every player needs to fire rockets or snipe, whilst near the Relic runner to gain "Aura of Immortality"
- Wait for Oryx to stagger then immediately run and destroy the bombs (Corrupted Light) left by the dead Ogres; one bomb per player
- Hide inside the Relic's shield
- Run circles now to avoid the light blast from Oryx (do not overlap other players paths)
- Repeat
At some point, usually Round 2 you will be teleported to another dimension where you have to kill a Shade of Oryx. Defeating this Ultra will warp you back to Oryx and you can continue to steps above again.
Rewards from Oryx include further Raid armour and weapons.