How to Create a Minecraft Video using Free Recording Software - Lets Play
Posted in
minecraft
This tutorial will guide you through downloading and installing free video recording software so you can create your very own Minecraft videos. Using a free and fast video recording program you can record Minecraft gameplay, record audio and upload to YouTube to share with others.
Half the fun of playing Minecraft is sharing your experience with other players. The traditional and best way to do this is to create a Lets Play video where you play Minecraft and record yourself narrating the action.
There are lots of different video capture and game recording software available to download. However, most of these recording applications are not free and cost a few quid (dollars).
Some of the
best recording software which you can pay for are:
Fraps - widely used by Minecraft fans to record videos
Sony Vegas - costs a serious amount of money but used by professionals
Camtasia - some great options but costs quite a bit too
For this tutorial we're going to recommend
FREE video recording software that you can use for Minecraft. It will do a good enough job for you to start your very own YouTube Minecraft video series! Its simple and there aren't loads of options to confuse you. It might lack the editing capabilities of other software, but by using additional software such as Windows Movie Maker you can easily trim the video later.
This tutorial will help you to achieve any of the following:
- Use free video recording software
- Record Minecraft
- Film Minecraft
- Capture Minecraft gameplay
- Create Lets Play video
- Create Minecraft YouTube video
Ok, the free recording software we recommend is:
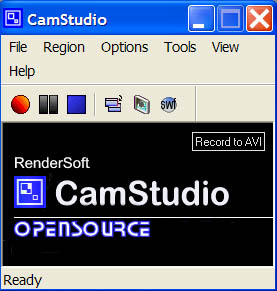
CamStudio
Its free, open source and just perfect for our recording needs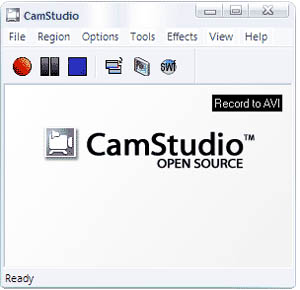
The following steps will guide you through the process of installing and using CamStudio to record your own Minecraft movies.
Installation
1. Download
CamStudio from the official website
2. Run the installer and follow the onscreen instructions (there aren't many so accept the defaults)
CamStudio only takes a couple of minutes to install and it requires next to no space on your hard drive. The recorded videos will of course require much more disk space, so check you have some space available before recording.
Setting up CamStudio
1. Run CamStudio
2. To get the best out of CamStudio we recommend you use the default settings:
- Video – Video Settings – Quality 70
- Record as AVI (use the button on the main screen to adjust if necessary)
3. If you want to record from the Microphone select:
Options - Record audio from microphone
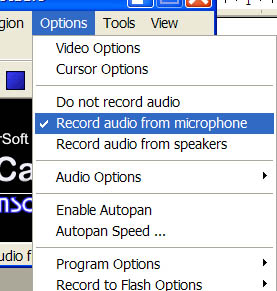
Make sure you select Microphone as the recording option using the volume control in Windows. You also need to select Microphone as the main volume output.
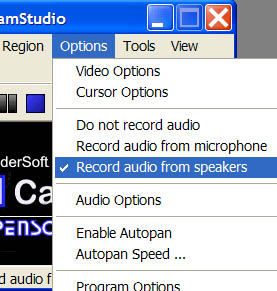
If you want to record from the speakers select:
Options – Record audio from speakers
The great thing about CamStudio is that the defaults are usually good enough to start recording straight away. If you want better quality then you can always adjust the Video Options. The best way is to test and test again. You'll get the result you're looking for in the end.
4. Make sure Region - Region is selected and not Fixed Region or Full Screen.
Recording Minecraft
Make sure Minecraft is running and resized to an appropriate window size (not full screen). CamStudio works better when you have both CamStudio and Minecraft side by side in windowed mode. It makes it easier to click the Record, highlight the region and click the Stop button when you're finished. Ok follow these steps to perform a recording..
1. Run CamStudio
2. Click the Red button to record

3. Draw a rectangle around your Minecraft window

4. Recording will start automatically
5. When you have finished recording, click the blue square (stop) button

6. Type the name of the file you want to save as. Click ok.
7. That's it! You now have an AVI video of your Minecraft game
Tips for creating your Minecraft videos
1. Experiment first
Try creating several test videos before putting them up on YouTube. Experiment with the settings and audio to make sure your audience will enjoy the video. CamStudio is free so it needs a bit of playing around with.
2. Practice speaking and write down some points you want to cover in each video
Its always good to have a script! Practice your speaking beforehand to avoid making mistakes during the live recording. There's nothing worse than having to record something again.
3. Don't swear and keep it clean
There is no point in swearing. It's rude and does nothing to make videos more interesting.
4. Do something different
Try downloading and using some video editing tools to create title screens or credits at the end of your video. If you intend to make a Minecraft series then these will help viewers follow your episodes and subscribe to your channel on YouTube. A good free video editing tool is Windows Movie Maker which comes included with some version of Windows or can be downloaded with later versions. IMovie is a similar tool for MAC users.
5. Watch the time
YouTube only allows for 15 minutes recording. You'll need to make your videos concise and to the point. Use video editing software afterwards to trim your videos down to size. Removing the boring parts will make for a more interesting video experience.
6. Make it flow
If you create a series then try and carry on where you left off. Try and create your videos like a story that continues one after another. This is also a good way to keep people coming back to see the next episode.
That's about it for this tutorial, enjoy recording!!
Our YouTube video of Minecraft created using CamStudio