How to install and setup your own Hamachi server for Minecraft Multiplayer
Posted in
minecraft
If you want to play Minecraft multiplayer (SMP) with your friends or family then we strongly recommend installing Hamachi. Hamachi is a safe and free VPN application from logmein that takes only minutes to setup.
If you're not sure what a VPN is, let us explain. A VPN stands for a virtual private network, it's a way to connect several computers together over the internet for a private and safe networking solution. In the case of Minecraft, Hamachi will let you create a mini network where you can all play Minecraft without the security risk of port forwarding or disabling your firewall completely.
Using Hamatchi will save you the trouble of unwanted guests and griefers appearing on your server. It will also prevent hackers and unwanted viruses from finding their way onto your computer. The logmein website goes hand in hand with Hamachi, allowing you to create a new network and manage users.
As luck would have it, Hamachi is free for up to 5 clients. All you need to do is create your own logmein account, which takes seconds. Then log in, setup your hamachi network and invite some friends along. You only need to register once and none of your friends need to register at all. We're going to cover these steps below.
For this tutorial we're going to setup a
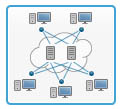
'hub-and-spoke network' which consists of hubs (servers) and spokes (clients). Remember, the Minecraft server application will run on the server and players will use the Minecraft client on the clients. The beauty of a mesh network is that traffic is sent back and forth between the server and clients but the clients no knowing about each other. They don't need to for Minecraft so why waste network traffic.
Logmein description of a hub-and-spoke network:
This network type provides more strict control over network members in terms of who is connected to whom. Hubs (servers) are connected to everyone else, spokes (workstations) are connected only to hubs, but not to each other. It is a typical choice for simple corporate use cases, where a workstation needs connection to servers only.
1. Setup a network using Logmein
1. Visit the logmein website at:
https://secure.logmein.com/products/hamachi/Tip: Do not download the Hamachi application from 3rd party download sites. Use the official site above.
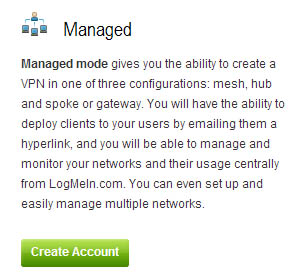
2. Under the
Managed account option, select
Create Account:
3. Once you've created your account, just login
4. Select
My Networks on the left hand side
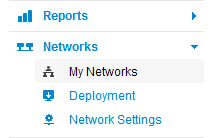
5. Select the
Add Network button
6. Give your network a nice name and select
hub-and-spoke for network type.
7. For security we recommend you keep Join Requests to
'Must be approved' option.
8. As you can see, the subscription is free for up to 5 clients:

9. Complete the necessary information and make sure your new network appears under
My Networks.
2. Install Hamachi on the server (host computer)
Hamachi is the free application that's going to manage and connect us to the new network we just created. Make sure that you're on the computer that you want to use as the server before following the steps below.
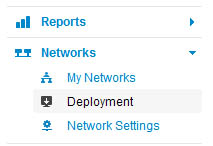
1. Click the
Deployment menu option on the logmein website:
2. Click the
Add New Link and complete the details
This is going to create a URL link which will download Hamachi, pre-configured for our new network. Nice huh!? We can send this link to our friends who we want to join our Minecraft server. Once they click the link it will install hamachi and automatically add them to the new network you created earlier.
3. Copy the link and open a browser window Chrome, Firefox of whatever browser you use.
4. Follow the instructions to complete the installation of Hamachi
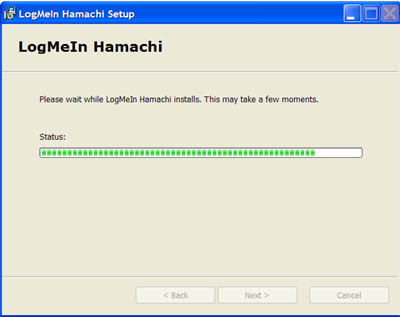
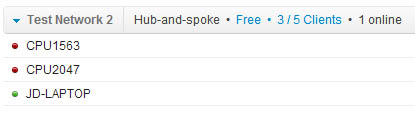
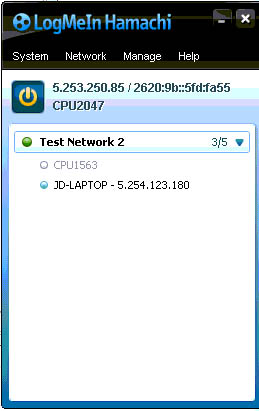
5. Start Hamachi and you should see something like this:

6. Now if you go back to logmein and click
My Networks and open the network you just created, you should see that you're online!
Now that you've setup Hamachi on your host computer (server), you can repeat the steps above to install it on any other computers in your house that will play the Minecraft client. Ideally, you should use one computer for the server and a separate computer for the client but it's not essential Remember to send the link to all your friends so they can install Hamachi and automatically connect to your network.
3. Select who will be the server and client(s) on the logmein website
A quick step this one.
1. Go to the logmein website and select
My Networks and the new network you created.
2. Click the
Members menu option.
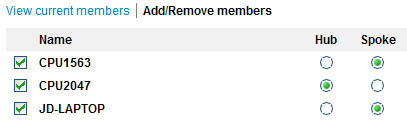
3. Click
Add/Remove members4. Now change the options so that the server (host computer) is the
Hub and all clients (players) are set as
Spoke. E.g.
That's it, the network is setup and ready to use! Congratulations!
4. Next steps - get IP address and start Minecraft server
Now that the private network is setup and your friends have all installed Hamachi, you can start the Minecraft server. Just run the minecraft_server.exe file and the Minecraft server will start up. It should look something like this:
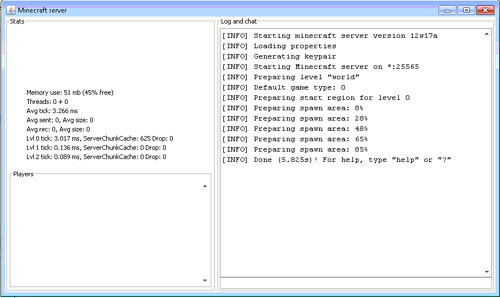
You should also have Hamachi running on the server and client(s). The server version of the Hamachi application will show who else is online. It also shows the IP address of the network, in this example its 5.253.250.85.
Players will use this IP address to connect to your Minecraft server. Follow these steps to connect to the new server:
1. Start Minecraft and select
Multiplayer2. Click
add server3. Type in the IP address (server address) of the Hamachi network we created earlier e.g. 5.253.250.85

4. You should see the server connection health bar appear next to the server name.
5. Click
Join Server and away you go!!
FAQ
Why should I use Hamatchi?First of all it's going to make your Minecraft server much safer and hassle free because you don't need to worry about configuring your home router. Secondly because its completely free.
I get the FAILED TO LOGIN: BAD LOGIN error message when trying to connect to the serverThis is probably because you haven't bought Minecraft (you have a pirate copy most probably from a file sharing site or torrent). You can get round this problem by editing the server.properties file (which is found in the same folder as the minecraft_server.exe file). Edit the file and change the online-mode option to false (instead of true). Restart the miencraft server and it should fix the problem.
Remember, Minecraft is an amazing game and you should buy it if you want to enjoy the multiplayer experience.
How can I get more than 5 friends to join?Logmein have various subscription options which cost as little as £12 (for a year) for up to 32 client connections. But think carefully, do you have the right memory and computer power to host that many players all at once?
My server is slowSadly, this all comes down to memory, network speed and computer processing power. If you're running an old laptop as the server then it's not going to be the best experience. We recommend upgrading your memory as a starting point. If you're feeling brave and have the cash then invest in a dedicated machine just for Minecraft.
My network is very slowIf you want to have a good multiplayer experience then you're going to need to have a decent internet connection for the server. At least a 4 meg cable connection for starters.