Witcher 3 Walkthrough - Griffin School Gear Quest
Posted in
witcher 3
One of the best ways to get strong weapons and armour in the Witcher 3 is to complete the treasure hunt quests for Viper, Griffin, Cat and Bear gear. Each of these, progressively harder treasure hunts will reward you with diagrams to craft new weapons and armour. In this post I'll be covering the complete tutorial for this quest which will set you up well for Novigrad, Skellige and beyond.
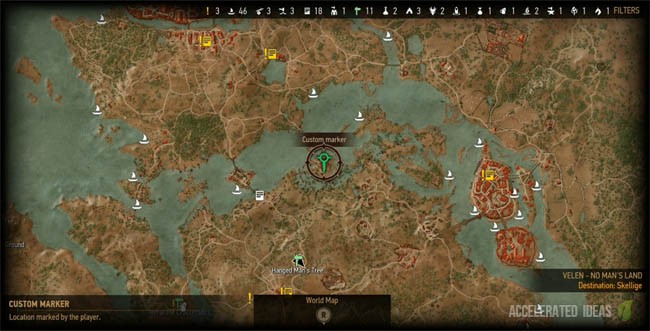
The big problem with the "school" quests is that they're really treasure hunts in the fact that you have no map, only clues to their locations. Thankfully I've already done these quests so I can help you out. First let's start with the second easiest of the bunch called the Griffin School Gear quest which players can complete right from the beginning of the game in the Nilfgaadian area of Velen.
When I say second easiest it's still pretty hard because there's a level 14 monster in the middle of the quest.
Complete video tutorialIf you prefer the video guide click the link below, otherwise keep reading...
 YouTube Walkthrough videoQuest Rewards
- Witcher Gear Diagram: Griffin Steel Sword (1 of 6)
- Witcher Gear Diagram: Griffin Silver Sword (2 of 6)
- Witcher Gear Diagram: Griffin Armor (3 of 6)
- Witcher Gear Diagram: Griffin Trousers (4 of 6)
- Witcher Gear Diagram: Griffin Boots (5 of 6)
- Witcher Gear Diagram: Griffin Gauntlets (6 of 6)
How to start the quest?Like other "school gear" quests this Treasure Hunt will only appear after you find the first piece of the puzzle. This is described below but for quick reference the quest becomes available in step 3 when you find the first piece of Griffin gear from Hindhold.
Quest Steps
As this is an unmarked quests there are no clear signal in order to start the quest without knowing the exact location. Here I'll teach you each of the steps in detail.
1. Travel to Hindhold
Hindhold is a little stone ruin in the northern half of Velen, easily accessible via the Hanged Man's Tree location which is revealed as soon as you arrive in Velen (Nilfgaadrian Connection quest).
Fast Travel from your current location to the nearest area, in my case this was Hanged Man's Tree. Then call in Roach to take you north towards Hindhold. It's a boggy area with lots of trees so don't expect a straight path on horseback to get there.
2. Explore the ruins
![Endrega monsters]()
Upon arrival you'll be greeted by some lovely Endrega insectoids - namely the Warrior and Worker variations. The workers aren't too much to worry about but watch out for the Warrior which has a nasty swinging attack that will poison you if it connects.
Next head through the stone ruins and work your way to the top level where you'll find a nest of Harpies.
![harpies]()
Kill off the harpies using the Igni fire spell and any bombs if they're to hand. These creatures are usually pretty easy to kill off so just complete the job and destroy the nest for some rewards and reputation.
3. Loot the small room
![door to small room]()
Stand in the middle of the roof area, face the nest and look left - you'll see a door leading to a hidden room. Explore the room using your Witcher senses and you'll see the telltale sparkling glimmer that means high value loot is close by.
Open the chest to claim the first diagram for a Griffin Steel Sword.
![diagram for a Griffin Steel Swor]()
This will also start the Treasure Hunt quest for Griffin School Gear. You can now select the quest from your inventory to track progress and see how many of the 6 Griffin pieces you have collected.
Rewards from this step:- Balstick's Letter (Quest Item)
- Witcher George's Confession (Quest Item)
- Witcher Gear Diagram: Griffin Steel Sword (1 of 6)
- Magic Item: Crossbow
4. Travel to Lornruk
![Lornruk location]()
In the far North West of Velen lies a tiny island with a lighthouse. This is the location for the next step of the quest and it's also the hardest part of the quest because of the Level 14 monster which protects the loot.
The best way to reach Lornruk is to Fast Travel to the Harpies Feeding Ground which lies just South East of the lighthouse. Otherwise it's a dangerous horse ride or slow boat ride to get there.
5. Swim to the Lighthouse
![lighthouse outside]()
The next part is very important. Don't attempt to cross the bridge to reach the lighthouse, it's broken and the steep fall will almost certainly kill you.
Instead, turn east past the lighthouse and swim across the small stretch of water to the Place of Power. Claim the Ability point and bonus strength for you signs, and then swim down into the water to reveal the secret entrance.
![swimming]()
The secret tunnel leads straight under the lighthouse but there's a few Drowners in the way. Equip the Crossbow and take them out one by one, it's not too hard just needs a good aim.
6. Explore the Lighthouse
![lighthouse]()
After swimming through the underwater tunnel, surface again, climbing the rock ledges to reach a wooden stairwell and numerous ladders leading the way to the top of the lighthouse.
I recommend you make your way almost to the top of the tower, looting along the way for valuable ingredients and free gear, but do NOT go to the very top. If you do then it triggers a monster fight against the Level 14 creature which guards the tower, this is a fight that lower level players will find impossible.
Instead when you reach the outside area of the Lighthouse, shown in the image above, turn the wheel to activate the drawbridge, giving you the option to escape later.
7. Climb the ladder to the loot
![harpy nest]()
The important ladder you're looking for lies just near the wheel that opens the bridge. Timing is important here if you want to avoid the monster fight. Climb halfway up the ladder and time the final ascent for when the monster is behind you, out of sight. Now quickly grab the loot from the chest on the right and you have yourself another Griffin Diagram for a Silver Sword.
Rewards:- Crafting Notes (Quest Item)
- Witcher Gear Diagram: Griffin Silver Sword (2 of 6)
- Dobromir's Journal (Quest Item)
8. Travel to Dragonslayer's Grotto
![Dragon Slayer's Grotto map location]()
The final part of the quest takes us on a journey to Dragonslayers Grotto for the final and best part of the quest. There are plenty of great rewards for this step and you'll have a complete set of Griffin armour by the end of it.
First, leave the Lighthouse using either the bridge or retracing your steps if you're stuck in combat against the monster. Head to the nearest Sign Post, probably Harpies Feeding Ground, then travel to Downwarren or as close to Dragonslayers Grotto as possible (central/east Velen).
Make the journey through the uneven and dense forest to the entrance to the grotto and again you'll be greeted by more Endrega monsters. Use some neat footwork and take them all out before venturing inside the grotto cave.
9. Explore the cave
![wraith fight]()
As soon as you step foot in the cave, wraiths will start to attack you so keep your Yrden Sign handy to finish them off quickly.
Walk straight towards the end of the first tunnel and turn left, you'll see a crack in the wall which can be broken using your Aard Sign. Follow this new winding tunnel, killing wraiths and follow the path round into a much larger area.
10. Defeat the vampire (Ekimmara)
![vampire monster]()
Now for another mini-boss fight, this time against a much easier Vampire. Simply use the Yrden Sign to force the vampire to reveal it's true self and then go hell for leather with your silver sword. It shouldn't take long to win this battle.
11. Claim the final Griffin diagrams
![Griffin diagrams]()
Walk to the upper level of the cave area and use your witcher sense to reveal the loot, taking note of the glimmering area which reveals the quest loot you're after.
The following diagrams are found in the chest:
- Witcher Gear Diagram: Griffin Armor (3 of 6)
- Witcher Gear Diagram: Griffin Trousers (4 of 6)
- Witcher Gear Diagram: Griffin Boots (5 of 6)
- Witcher Gear Diagram: Griffin Gauntlets (6 of 6)
Congratulations you now have a full set of Griffin Armour and Swords which you can craft from a trusty Armorer and Blacksmith.