Ascension Easter Egg Steps - Zombies Chronicles (Black Ops 3)
Posted in
black ops 3
Ascension is one of the classic Treyarch maps that has been remastered in the Zombies Chronicles (DLC 5) for Black Ops 3. Ascension dates back to the original Black Ops 1 era and is regarded as one of the best maps in the series. In this guide you'll find complete steps for the Ascension Easter Egg with simplified explanations and screenshots.
At a time when fans were still recovering from the amazing base zombies map, Kino der Toten, Treyarch pushed out their first DLC zombies map called Ascension. Releasing on 1st Feb 2011 the map contained the first major Easter Egg that become a mainstream expectation for all future maps.
Even outside of the short Easter Egg, Ascension contains several exceptional additions including the Gersch Device, whose concept would later be reused in Shadows of Evil and even Infinite Warfare Zombies, the Matryoshka Dolls and of course the introduction of PhD Flopper (replaced by Widows Wine on Zombies Chronicles) and Stamin-Up, two perks that would reappear on several occasions.
Players should note that Zombies Chronicles contains a remastered version of Ascension and there may be new "remastered" easter eggs or slight variations to the original EE. For this reason I will include either updates to the original guide or a separate guide further down for these changes. In either case, this will be a definitive step by step guide.
There was originally no name for this Easter Egg but many players refer to it as the "Casimir Mechanism" or "Mystery Man".
About the EE
The overall goal for the Easter Egg is to repair the mechanism so that a distressed Gersch can be freed from Samantha. You will hear him pleading with you as soon as you start the map. The EE takes around 30 mins to complete, with most of that time depending on your luck pulling the Gersch device from the mystery box and later the ray gun, thunder gun and crossbow to power the Casimir Mechanism.
It is a 4 players Easter Egg and CANNOT be completed SOLO.
Original EE - All Steps
1. Throw the Gersch Device at generator
Find the mystery box location (typically at the top of the control tower, 3rd floor above spawn) and spin the box until you retrieve the Gersch Device. This is a placeable trap that creates a mini black hole that sucks in zombies.
Go to the launch pad where PhD Flopper is (Widows Wine in the remastered map) and walk to the very end of the little corridor where the perk machine is. Notice the wind howling? Outside is the location of the generator and it's your first target.
Go back outside, down the ramp of the launch platform and take a left turn towards the barrier/window.. Throw the Gersch Device outside of the map boundary shown in the image above.
If done correctly you will suck in the generator and Gersch will say "it needs as much power as possible". However, if done incorrectly Samantha will steal your Gersch.
2. Power the device by enabling the 4 nodes
Node 1![TV Monitor by lunar lander area]()
Go to the landing pad area where you can buy claymores. You should hear the howling sound again.
Interact with the TV that has a static image (hold X/Square) and it should change to a triangle shape and a computer audio cue will confirm that Node 1 is enabled.
Node 2Now you really need the four players. During a monkey round, space monkeys will come down and try and steal your perks. During this period, four buttons will appear in the same room as each of the four perks: Jug, PhD, Speed Cola and Stamin-Up (there is no button for Quick Revive).
- PhD - left side of the machine
- Jug - directly opposite
- Speed Cola - opposite, on the left wall opposite stairs
- Stamin-Up - left hand side
Have all four players press their buttons together. You should hear a computer audio cue to signify that Node 2 is enabled.
Node 3![Clock in rocket launch bay]()
For Node 3 you'll need to do a couple of things beforehand. First, open the PaP area by riding each of the three lunar landing pads to their alternate positions, then interacting with the control panel on the 3rd floor rooftop to open the launch doors. Secondly, for the Black Ops 1 version of the map get the ballistic knife from the mystery box - this is NOT required for Zombies Chronicles.
Now that you have those two done, you can proceed to activate Node 3. Players should note that this step actually takes quite a while and you need someone to hold a crawler outside for several minutes.
Go down to the launch pad where the rocket once was and take note of the clock on the wall there. Stand back a little, away from the clock, get one player to equip the ballistic knife and make sure all players in this area stand perfectly still. The clock will start to tick and the hands will move.
For Zombies Chronicles, there is no need to equip the knife or stand still, but you must stay within the circular area in front of the clock.
Eventually an audio cue will confirm that Node 3 is activated and the round will end. Gersch will say "yes almost there, hurry she's coming"
Node 4![Lunar Lander]()
The howling sound moves to the lunar landers now and the key to activating Node 4 is to ride the lander to spell the word LUNAR. The best way to do this is stand in the Lunar Lander and get your friends to call the lander to save wasting any points.
Starting from the spawn lander location, ride the lander to these locations:
- To Stamin Up
- Back to spawn
- To Speed Cola
- Back to Stamin Up
3. Power the Casimir Mechanism
![Casimir Mechanism]()
The actual Casimir Mechanism is outside, in the area adjacent to the Stamin-Up area where the claymore wall buy is. As you enabled each of the nodes, a light appeared on the Mechanism. You can see this on the right side of the image above.
Now, for this step you will need some serious firepower (see list below). Some of the weapons below are recommendations from Black Ops 1 but you can also do this step with equally powerful weapons from the Black Ops 3 series in place of the Thundergun, Crossbow and Rayguns
- Zeus Cannon (Upgraded Thundergun)
- Gersch Device
- Matryoshka Dolls
- Upgraded Crossbow
- 2 x Upgraded Rayguns
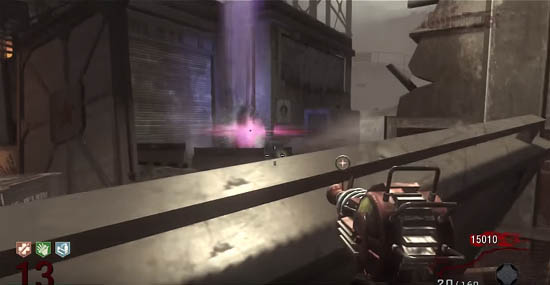
Look at the Casimir Mechanism and take note of where the lights are pointing. There is a light (orb) on the floor in front of the device.
Now throw the Gersch device onto the orb, then throw the Dolls followed by maximum firepower from all of the upgraded weapons aimed at the black hole.
![Gersch device powering Casimir Mechanism]()
If done successfully, an audio quote will say: "Casimir Mechanism safety protocol initiated, shutting down power systems". Gersch will say "yes I'm free!".
Congratulations you have completed the Easter Egg and all players now have Death Machines for a couple of minutes.