The Shadowed Throne - All Easter Egg Steps
Posted in
cod ww2
Welcome to the complete Easter Egg guide for The Shadowed Throne, the DLC 2 zombies map for Call of Duty WW2. As always, the guide comes complete with helpful screenshots, important collectibles and map locations, and any puzzle solutions required to successfully complete the main Easter Egg.
Quick NavigationThe Shadowed Throne is the second DLC zombies map for COD WW2 and naturally the story continues where The Darkest Shore left off. The team are now on the hunt for Straub in the darkest corners of Berlin, as they reclaim an additional piece of Barbarossa's sword (the Blade) and ultimately fight against the Stadtjäger BOSS.
Although the Darkest Shore didn't last long on the longevity scale, the Easter Egg was a fun challenge to crack. We all hope that Sledgehammer's DLC 2 can provide the same meaningful hunt for the community, this time with the added advantage that a reduced number of YouTubers have been invited to early recording sessions.
I know many of you enjoy going SOLO on these hunts, myself included, and therefore I've included warnings for steps that require multiple players. I've also added a bolded statement here to signify whether the entire Easter Egg is possible SOLO or not - this will be updated as appropriate.
SOLO Status: This Easter Egg is possible SOLO. However, tuning the radio, entering the safe code and turning the statues are very difficulty steps with a zombie chasing you.
Achievements
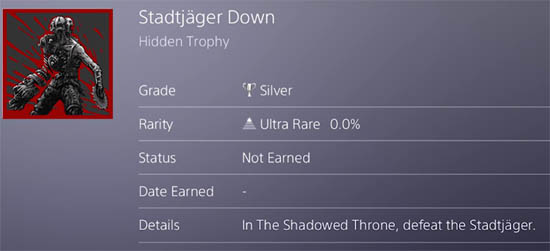
We know from the achievements list that the
main Easter Egg is called "Stadtjäger Down" and requires players to defeat the Stadtjäger BOSS, the ugly creature that was first shown during the Shadowed Throne teaser trailer. Successfully defeating the BOSS completes the main Easter Egg for The Shadowed Throne. Of course, there are a number of collectible inventory items and a series of EE steps that must be completed first before the BOSS room is accessible. All of these steps are detailed further down below.
Also of significant importance is a second achievement that reveals the
new piece of Barbarossa's sword - the Blade.This achievement is called "Ammo Conservation" and challenges players to obtain the Blade without firing a gunshot. This sounds like a genuinely difficult feat but it could imply that the Blade is available early in the game or that the new melee weapons are very effective. Whatever the case may be, the Blade is an important part of the main Easter Egg.
As you may remember, we acquired the Hilt in The Third Reich and then the Pommel in The Darkest Shore. Together with the new Blade, we're close to completing this mysterious weapon once and for all. I suspect though that Sledgehammer will surely save a final part and the resurrection of Barbarossa for the final DLC map and the conclusion of WW2 zombies.
All Easter Egg Steps
1. Tune the radio to talk to the Russians
![Radio and tuning chart]()
The first step of the EE requires you to tune a radio to an exact frequency and talk to the Russians. First, look for the radio in the outside street area (Main Street). Approach the device and a little radio icon appears in your inventory (notebook). The important part here is to take note of the radio model, written on top of the radio e.g. LS3.
Now go to the church and take note of the three posters (charts) on the wall. They are located underneath the stain glass window and opposite the prams with baby toys in them. Using the charts, find the district name with the red pin on it and then lookup both the district name and radio model on the other chart. This will give you the frequency you need to enter on the radio.
Return to the radio and enter the frequency numbers. E.g. in the image above, if the district was Teltow-Flaming and the model was LS3 then the frequency would be 78.3, 80.
If done correctly a new quote will play saying "Yes, hello? You are...Americans? English? This is...I am Mikhail!". A radio mast icon also appears in your inventory next to the radio:
![Inventory with radio mast]()
2. Shoot the flare
![Flare box]()
Go to the outside area with the broken ruble and a clear view of the sky (Plaza area). Look for the sparking flare and the closed box of flares near to the wall. Melee the box of flares to open the box, then interact again to fire one up into the sky. A notification appears saying "Fired the Flare" and a short piece of dialogue from Straub plays. "What? Hahahaha oh no, no, no. You are far from your allies, little monkeys."
A third icon appears in your inventory, next to the radio mast:
![New icon in inventory]()
3. Get the Wunderbuss Wonder Weapon
![Wunderbuss part]()
To proceed further in the Easter Egg you now need the maps Wonder Weapon called the Wunderbuss. This is a very easy weapon to acquire - follow the simple steps below:
- Collect the red battery item. Most likely spawn is in the Museum or Theater
- Insert the battery into the blue panel near to spawn, this opens the small caged room
- Tempt a red sparking zombie (sizzler) into the same room with you
- Remove the battery from the wall and insert into the Wunderbuss on the table
- Now melee the sizzler zombie to get a Geistbolt part
- Insert into the Wunderbuss weapon on the table
- Pick up the new weapon
- Shoot the panel on the wall with the Wunderbuss to re-open the locked door and leave
4. Charge the tether pods
![Charging Tether pods]()
There are now three tethers pods on the map, these were dropped by the giant airship (blimp) that you spawned via the flare in step 2. Locate the first tether device in the Plaza, outside by the flare box you interacted with. Kill zombies very close to the device to charge it. Straub will eventually say "You think you can bring down my Zeppelin?".
Now locate the other two tether pods which are in the Museum and the Destroyed Building. In each location, use the Wunderbuss to charge the tether pod by holding down fire and carefully aiming at the pod. Eventually when each pod is charged up this step is complete.
5. Power the projector
![Cinema projector]()
A series of small steps here.
Go to the bedroom with the dead woman on the bed. Interact with the painting on the wall to receive the notification "Found the Dancers Painting".
Now go to the theatre and locate the projector. Shoot the pillar above the projector to release a film reel. Interact with the projector to place the painting in front of it and the reel inside of it. Finally, charge the projector using the Wunderbuss until the notification "Powered the Projector" appears on screen.
A bright light will now illuminate a map on the stage.
6. The smuggler
![Tuning radio]()
Go to the Wunderbuss (Wonder Weapon) room which contains the cash register (till). Using the Wunderbuss shoot the cash register to open a secret compartment. A tray pops out with a photo underneath. Carefully read the numbers on the poster - these are another set of frequencies.
Return to the radio again and enter the frequencies, one on the left and the other on the right. Dialogue now plays saying "Hello? Can anyone hear me?". A new notification pops up saying "Contacted the Smuggler" and a microphone appears in your inventory.
![Gas panel]()
Now go outside the theatre (Plaza area) and look for the Gas panel on the ground near the guitar (see image above). Throw a precise grenade at the Gas panel and the smuggler says "The...untoten are outside the door. I can't leave. I need something to kill them.". Interact again to pass weapons through the gap to give the smuggler the weapon he needs. If you give the wrong weapon he says "I don't have the right ammunition for this weapon". You MUST give him a BULLET weapon to proceed and it appears to be a random choice. Try a shotgun or LMG first.
Tip: There are bullets on the Wunderbuss table that indicate which type of weapon the smuggler will accept.
If done correctly, the notification "Armed the Smuggler" will appear.
7. Smugglers Bat
![Paid the smuggler notification]()
The projector you activated earlier is shining a bright light and image onto a projector screen. This image is actually a map of the sewer.
Go to the Gas panel at the bottom of the stairs on Main Street, outside the Cabaret (theatre) near the burnt out bus. Tempt a bomber zombie near to the Gas panel and explode the bomb above the panel to help the smuggler. If done correctly, he says "I got rid of the Untoten, but there's something blocking my way".
Now throw Jolts (money) into the Gas panel hole and the notification "Paid the smuggler" appears on screen. The smuggler says "Thank you! I should reach my apartment soon! Knock...knock 3 times once you have found it".
![Smugglers bat icon]()
For the final part of the Smuggler quest line, go underground to pick up the new melee bat weapon. It's in a small side room with broken bottles on the floor, near the blue panel where you inserted the battery for the Wunderbuss. You must melee the wooden door three times first to open it.
After picking up the weapon a notification appears saying "Found the smugglers bat". This is a special melee weapon with an extended range attack that shoots a charged bolt. It's really good!
Go to the set of three panels (by Church) and place the first special melee weapon in the frame. We need to collect all three special melee weapons to open the secret door - more on this later.
8. Dancer's Dagger
![Green light on projector map]()
Return to the map in the theatre and check the green light location. Find the doll in the indicated map area and this time melee kill zombies to collect souls (watch as zombies spark upon death). Pay attention and count the number of zombies it takes to fill the soul box. Repeat this soul collecting phase four times, checking for the next green light location each time and counting the number of kills before the sparks stop appearing.
To help you, here's a list of known doll/clown locations:
- Wunderbuss room near wooden smuggler door
- Pack-a-punch room, near elevator
- Main Street, near to the pit next to Staminup
- Near Double tap machine
- Theater, next to projector screen (the actual screen/map)
- Near the pit on the ground, in front of the three melee weapon slots
- Between museum and church, left side of church
- Museum, lower floor near the middle chandelier
How to open the safe![Safe]()
The numbers you have been counting are the code to open the safe that contains the Dancer's Dagger, the second special melee weapon. It's not easy to open the safe so pay attention: Go to the safe in the Apartment area:
- First set the dial to 0
- Spin the dial four whole times to the right and land on your first number.
- Rotate the dial to the left, passing your second number twice and then landing on it the third rotation.
- Rotate the dial to the right, passing your third number once and then landing on it the second rotation.
- Rotate the dial left again, landing directly on your fourth number
Note: Some players have reported that only one complete spin is required to reset the safe before entering the first number and then all other numbers can be entered directly without rotating the dial a whole turn each time. It's up to you, but if you're getting stuck then follow the instructions above which work 100%.
If you enter all numbers correctly, the safe opens and the dagger melee weapon is yours. This weapon is also excellent and has a special takedown attack that restores either ammo and health. Now return to the three wall panels and place the dagger in the empty middle panel:
![Melee weapon panels]()
9. Axe
![Axe melee weapon notification]()
The final melee weapon is the axe. We're going to tune the radio again but first we need a new frequency. The new set of numbers are written in one of three places, look for the knife scratches:
- Theatre, on the dresser at the back side of the stage
- Museum, wall slab below the M1 Grand wallbuy
- Elevator near the Apartments
Note down the numbers and go to the outside radio and change the frequency to start the morse code sequence. Listen carefully for the numbers and then return to the radio charts (the ones with the frequencies and districts). These morse code numbers are actually co-ordinates. Place the magnifying glass (found upstairs in the theatre, by sofa and top hat) onto the map and move it over the correct district number for the co-ordinates you just acquired. Finally, go to the church and open the wardrobe door to grab the Golden Bowl inside.
Now return to the museum and place the bowl on the scales at the top of the stairs. Go outside and melee a fire zombie next to one of the armour machines, then collect its head from the machine. Return to the scales again and place the head on it. If done correctly, a notification should appear for "Balanced the Scale".
Finally, get melee kills close to the rabbit statue (to the right of the scales) to collect souls. After a short duration the head will be charged and a secret drawer opens with the Axe weapon inside. This weapon has a charged attack which activates whilst sprinting.
Finally, return the Axe to the three panels on the wall.
10. Open the secret door
![Three melee panels]()
Ensure that all three special melee weapons have been placed in the wall panels. Now get zombie kills beside the panels in this order:
- Normal zombie kills for the Dagger
- Fire zombie kills for the Axe
- Pest zombie kills for the Bat
When all three weapons are charged, the secret door opens to the Hidden Courtyard area.
11. Golden statue and ravens puzzle
Upon entering the secret area, use the Wunderbuss to charge the final tether device which is stuck in the ceiling of the arena. The next objective is to get all the surrounding statues facing the center statue, starting with one wall at a time. When you turn one statue it affects the neighbouring statues.
To save a lot of time, use the tool below to solve the puzzle on each wall...
SOLUTION Pick the wall, then select the direction of each statue. N = statue facing wall, S = statue facing you, E = facing right, W = facing left Choose wall Select current statue positions: N N N N Show Solution Solution: When all statues are correctly positioned, a collection of four collectible ravens spawns into the center.
![Ravens step complete]()
Pick up the golden ravens and place them one by one at the base of the golden statue. The position of each raven is highly important. The reasoning behind the positions is unclear but the image above provides some guidance of where they should be placed. If done correctly the notification says "Collected the Ravens". Now pick up the Blade weapon from the golden statue and enjoy the Arc special attack that this sword has. When ready, place the Blade into the empty slot by the gate to exit the area again.
12. Board the zeppelin
![Pod to reach the zepplin]() Warning:
Warning: This is your last chance to stock up on ammo, weapons and any utilities like the Jack in the Box. A good tactic is to grab the free perks from the Hangman game now. See the Side Easter Eggs section below for possible Hangman words.
When ready, make sure all players have a fully filled Wunderbuss then all stand inside the black pod which is near the radio in the Plaza area (see image above). It has a red glowing ceiling, much like the tether devices. Get all players to shoot the glowing ceiling using their Wunderbuss, it takes a few seconds.
If done correctly, all players are teleported to the zeppelin and the notification reads "Boarded the Zeppelin". Once inside the zeppelin defend yourself from zombies and use the various control panels to re-route the power and open the gates. This is quite simple, just route the blue beam from the left of the panel to the right. Gradually move from area to area as you repeat the process, eventually reaching Straub.
Prepare for an epic moment as Straub is overrun by zombies and the notification "Defeated Straub" appears.
13. BOSS fight
The time has come for the final BOSS fight and prepare yourself as it's pretty darn hard!
Avoid the onslaught of regular zombies and dodge the BOSS attacks as you Wait for the opportunity to strike during his weak phase. As soon as you hear a loud roar you'll know it's time. Yellow hit markers appear on his back during this phase to signify that it's time to unleash everything you have.
Repeat this strategy for a while until the BOSS enters his final phase and starts throwing electrical discs. Again, bide your time and wait for the BOSS to exert all of his electrical energy and then strike with the new Wunderbuss Wonder Weapon. This is the ONLY weapon that works for now and watch carefully for hit markers to know you're doing this right.
All being well, the BOSS will eventually topple and it's time to take the pod back down to ground level to watch the ending cutscene.
The EE hunt is now complete! Expect a few clarifications to this guide over the coming days and I hope you found this guide useful.Side Easter Eggs
Hangman Game - Free Wonder Weapons and Perks
![Theatre sign]()
Go outside to the theatre entrance with the flashing red letters above. Play a little game of hangman to win free wonder weapons and perks. Using the golden panel on the left, shoot the buttons to interact with the game. Shoot the top or bottom buttons to cycle through letters and shoot the middle button to select that letter. You simply need to spell words on the right.
The following words provide secret rewards:
- THEJACKBOX - spawns a Jack in the Box (Monkey Bombs)
- WONDER - spawns a set of free Wonder Weapons including the Ripsaw and Tesla gun
- GEISTKRAFT - spawns a powerup (full meter)
- DAMNATION - spawns a nuke
- REAPER - spawns an instakill
- FAMISHED - spawns a max ammo
- GLUTTONY - spawns a double Jolts
Free Money and Power-Ups
The map contains five collectible hats which players originally thought were part of the main EE. It turned out that the hats were part of a side EE, much like the hangman game. Simply collect all the hats and then place them onto the Cheetah in front of the projector screen in the theatre (Cabaret).
The placed order must be: Fedora first, then Pilot Cap, Garrison Cap, Officer Hat, and then finally the red hat on very top.
Hat locations are:Fedora- Inside the Church, right of the Weapon Box
- Inside the Cabaret, left of the golden statue's feet
Pilot Cap- In a briefcase in the Underbelly
- Next to Schnellblitz, underneath the bench
Garrison Cap- Inside the Museum, on a model head
- Inside the Cabaret, on top of a guitar
Officer Hat- Inside the Museum, on the desk near Faustblitz
- inside the Apartments, near the vase of flowers
Red Hat- Inside the Museum, on top of a skull
- Outside the Cabaret, In a bus
Pack-a-Punch Guide
![Fuse panel to open PaP area]()
Although the Pack-a-Punch is an optional step, it's certainly worth having more powerful weapons for high round survival. The PaP area must be unlocked through a simple series of puzzles. Using grenades, explode the fuse panels in the following areas:
- Underbelly area, through the metal gate (see image above)
- Destroyed Building (actual map area name), on the brick wall near collapsed ceiling
After throwing the grenades and exposing the fuse panels, use the Wunderbuss weapon to overcharge the fuse boxes and open the PaP lift door. The lift door is also inside the Destroyed Building area.