Blood of the Dead - All Easter Egg Steps
Posted in
black ops 4
Welcome to the Easter Egg guide for Blood of the Dead, the Black Ops 4 zombies map that welcomes back the original four heroes to Alcatraz Prison. This guide contains detailed steps for completing the main EE along with puzzle solutions, map locations and screenshots where necessary.
As you probably know, Blood of the Dead takes place on an expanded version of Alcatraz Prison, similar to but much larger than the one present in Mob of the Dead. Jason Blundell confirmed that it expands the original map by up to 35% and is not a straight remake but rather a remaster because of the significant story implications. Players can explore new areas of the island outside of the prison confines, including a secret underground laboratory (Richtofen's Lab) where the Victis crew are held, a large Recreational Yard and even pay a visit to the Warden's House.
Contrary to the original, the map contains several new features such as fast travel tunnels (to compensate the larger play area), two power switches and a new PaP process that replaces the Golden Gate bridge. Many of the original elements are still intact though including the dog heads (Hell's Retriever), Acid Gat upgrade, gondola and traps. The vast majority of the original prison area is also a like for like remake, which makes it easy for returning players from Black Ops 2 to navigate their way around.
About the EE
The main Easter Egg trophy for Blood of the Dead is:
Most Escape Alive
In Blood of the Dead, escape
As the name implies, not everyone will escape alive from Alcatraz prison in Blood of the Dead. This is a major hint towards the ending cutscene but I will not spoil that in this guide. During the hunt, players will need to assemble a range of weapons including the Hell's Retriever, Acid Gat and Spoon. The new Spectral Shield plays a major role in many of the EE steps thanks to it's Spirit Blast and Spectral Vision features.
SOLO players will be pleased to know that the entire EE IS possible SOLO.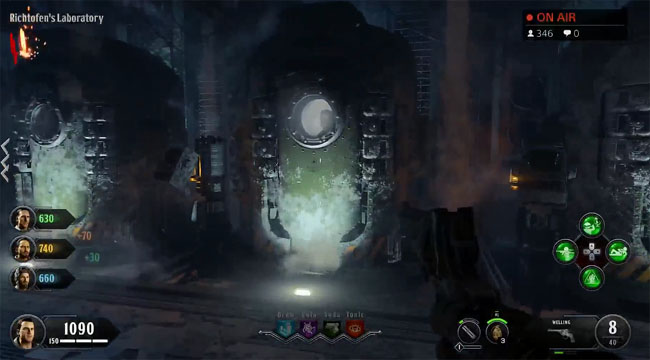
What we do know is that the events of Black Ops 3 are being rewritten in Blood of the Dead. The Primis crew were supposed to leave through the portal for Zetsubou no Shima but instead the portal has been broken by Brutus. The Kronorium, an ancient book which when opened displays an entire timeline of someone's fate, is now changing in the hands of Richtofen. The characters are stuck inside Alcatraz prison, pre-Gorod Krovi with no knowledge of the existence of Monty.
![Roof area in Blood of the Dead]()
Besides the main quest, Botd also contains many side easter eggs, most notably for the Wonder Weapon, buildable items and secret songs. This guide will focus primarily on the main EE quest but for other side EE's check the link at the end of this post.
All Easter Egg Steps
1. Turn on the Prison Power
![Power switch]()
There's no purgatory mode in Blood of the Dead so you're going to need to turn on the power first. Rather than just a single Power Switch, Treyarch have added two switches in this remastered map, each one on a different side of the map.
Power Switch 1 - West SideThe first switch is inside the Power House building. You'll reach this building early in the game after unlocking several doors, the last of which is leading outside from the Transverse Tunnels.
Power Switch 2 - East SideThe other power switch is in Building 64 which is a familiar building from the original Mob of the Dead map. It's quite far into the map, near the Docks. The most obvious way to get there is via Citadel Tunnel -> China Alley -> Building 64.
2. Build the Shield
![Shield]()
With no Purgatory mode anymore, the red electric switch boxes don't do anything when interacted with anymore. Instead, you can use the buildable shield to absorb energy which can then be blasted at a switch box to activate it.
Therefore it's imperative that you build the defensive shield early in the game, not only as a form of protection but also to aid the Easter Egg process.
See the additional guide for
finding the shield parts and building the shield or watch the short video:
 YouTube Walkthrough video
 3. Unleash the Spirits - Unlock the Pack-a-Punch
![Unlocking PaP by shooting meter near electric chairs]()
Not only does the PaP machine upgrade your weapon but it's also essential for the Easter Egg. Successfully unlocking the PaP will change the quest objective from
Unleash the Spirits to
Shock and Denial.
Note, the PaP machine will automatically disappear and reappear either at the Power House, Building 64, or back to the Roof.
YouTube Walkthrough video Follow these simple steps:- Use the shield key to collect zombie souls - to do this, equip the shield and shoot zombies by holding down the trigger until their souls are collected. After about 3-4 zombies the shield is fully charged.
- Activate meter on roof - go to the roof of the main prison, use the shield to fire a Spirit Blast at the meter to the right of the electric chairs.
- Spirits should appear and the PaP is now unlocked
4. Get the Blundergat
The Blundergat is a mystery box weapon. Rack up enough points to pull this weapon randomly from the box. It comes in basic form to start with (much like a shotgun) but we'll upgrade it soon.
Tip: You can also get a free Blundergat but you'll need the Hell's Retriever first.
YouTube Walkthrough video - FREE Blundergat 5. Upgrade the Blundergat to the Magmagat
The Magmagat is an upgraded form of the Blundergat and you'll need to complete a little side quest to upgrade it. Follow the additional guide for
upgrading the Blundergat to the Magmagat.
Note, you also use the Acid Gat for some of the Magmagat steps below but it's far weaker than the Magmagat currently.
6. Get the Hell's Retriever
![Dog Head]()
Everyone's favorite deadly boomerang makes a come back in Blood of the Dead. Not only is the Retriever great for killing groups of zombies, it's also essential for collecting out of reach objects.
Follow the additional text guide for
getting the Hell's Retriever or watch the short video:
YouTube Walkthrough video 7. Get the Spoon
![Number sequence in Citadel Tunnel]() YouTube Walkthrough video (2 mins)
YouTube Walkthrough video (2 mins)Make your way to the Warden's Office in the main prison and look through the Spectral Shield to see the hidden numbers on the pillars. They should appear in bright blue. Take note of these numbers.
Go to the bottom of the Citadel Tunnels (spiral staircase) and look for the locked cabinet on the wall. Use the Warden's Key (which you collected after killing the Warden the first time) to open the cabinet. Shock the opened cabinet with a Spirit Blast from the shield to activate it.
Enter the same three digit sequence and the elevator should activate and fall into the water below.
Make your way outside to the Dock, by the area overlooking the water and the crane in the distance. Using a charged shield activate the meter and the crane will scoop up something from the water. Use the Hell's Retriever and throw it at the cranes net with the skeleton in. Now pick up the Spoon from the box (hold square).
8. Upgrade Spoon to Golden Spork
![Bottom of water tower]()
Take the newly acquired Spoon to the Infirmary and place it in the bloodstained bathtub. Now go to the roof and get zombie kills using the
Acid Gat or
Magmagat. The blood will drain down and fill the bathtub.
After enough kills return to the bathtub and hold square to drain the blood. Now go to the Catwalk and walk up to the first circular platform (starting from West Grounds). Look out of the left hand side towards the large water tower. Shoot the hinges of the water tower so it collapses then throw the Hell's Retriever at the base of the tower (near tree) as shown in image above.
You should have the Golden Spork now.
9. Get Hell's Redeemer (OPTIONAL)
![Blue dog head]() Optional step:
Optional step: This is an optional step but I strongly recommend you get the more powerful Redeemer if playing SOLO.
Go to the Recreation Yard and get 30 kills with the Hell's Retriever whilst it's glowing blue. There are only certain spots along the walkway where the Retriever will glow blue so pay attention. Once you have enough kills a wolf howl sound will play.
Next, find the blue dog head. It's the same silhouette of the dog head that appears on the wall for the Hell's Retriever but this time it's blue. There are three possible areas where the blue dog will appear and it can only be seen through the Spectral Shield:
- Citadel (upstairs)
- Recreational Yard (around the bridge)
- Eagle Plaza
In all cases, the blue dog head is always in an out of reach area, usually by lava, slightly outside the map. Note, the location of the dog head changes each round and is unique to each player.
Once found, throw the Retriever at the head to complete the step. If done correctly you should get a character quote confirming that the dog has taken the Hell's Retriever from you. You will have temporarily lost the weapon until you find it again.
Wait for a dog round to start then suck dog souls into the shield. Now return to the prison and use the shield to look for the ghost dog (while the dog round is still active). Spirit Blast the dog with the shield and then take the Fast Travel passageway from Wardens House to collect the Hell's Redeemer from the same passageway where you originally collected the weapon.
10. Shock and Denial - Open Warden's Ritual Chamber in Warden's House
![Warden's Ritual Chamber]() Important:
Important: You cannot progress this part of the EE until round 17+. This is when the Warden starts using his ground slam attacks.
Tip: Shield blast the panel in stairwell of Citadel Tunnels, enter code 666 to spawn a Brutus. Can only be used once per game.
Once you have the Golden Spork head to the Warden's House and go inside. Go up the stairs that lead to a dead end, use the Golden Spork (or Spoon) to scratch the wall (opposite Titan wall buy). Now tempt Brutus up the stairs and get him to EMP ground slam attack. He should smash through the wall.
Now pull the lever to reveal a secret room inside - the Warden's Ritual Chamber.
Inside the secret room is an electric chair and a couple of tables. Interact with the red stone/orb on the table to change the quest objective to
Pain and Guilt and pull the lever next to the chair.
11. Pain and Guilt - Follow the blue/ghost bird
![Map in Richotfens lab]()
For this step, although it's not essential it's a good idea to upgrade the shield to hold extra charges. Simply spin the mystery box until the lock symbol appears. Shock it with the shield key and then throw the Hell's Retriever. Your shield automatically upgrades to the Attuned Spectral Shield.
Locate the map in Richtofen's Lab (see image above) and insert the red bulb/stone you retrieved from the Warden's Ritual Chamber. Next, interact with the Kronorium in the same room and watch as the blue ghost bird flies away.
![Ghost bird]()
Now, use the Spectral Shield to find and shoot blue birds in several locations. Listen carefully for the bird chirps to know you're close and use the shield to spot it (see image above). For the first THREE birds shoot them with the shield, for the FOURTH bird use zombie blood (enter code 872 in Citadel Tunnels to get Zombie Blood reward) and use the Hell's Retriever to hit the bird.
Tip: The FOURTH bird appears as just a blinking dot until inside Zombie Blood, usually near the Dock/Citadel or Showers. You'll know when it's time to use Zombie Blood because the Warden starts crying/laughing.
The FOURTH bird will drop the Kronorium book. Pick it up.
Possible bird locations:- Behind Electric Cherry (original map) i.e. opposite dog head in C-D Block upstairs
- Roof of the Catwalk, when walking towards Recreation Yard
- Outside Warden's Office, high up near ceiling
- Library, on top of the bookcase
- Lighthouse
- Citadel, first room leading away from Warden's Office
- Cafeteria, on Weasels Hat above the entrance
- Docks, if Brutus crying use Zombie Blood reward from Citadel Tunnel (872 code), bird is on a fence above perk machine in Dock
- Richtofen's Lab (spawn), second floor
- Roof, above the door leading to roof
- Infirmary
- Monkey Bomb Statue, below cell where dog head is
- Westgrounds, on the truck
- Citadel Tunnels, on the numbers panel
- Michigan Avenue, on volt meter
- Warden's Office, doorway
- Warden's Office, fireplace
- Citadel, sandbags
- Showers, on washing machine
12. Pain and Guilt - Read codes at electric chair
![Secret code at electric chair]()
After the fourth bird you should have the Kronorium book. Take it to the Warden's Ritual Chamber (secret room you opened earlier) and place it on the electric chair body.
Using the shield, look at the electric chair and you'll see three numbers (just like the numbers you entered for the Spoon in Citadel Tunnels). Remember the three numbers and return to the Citadel Tunnels and enter the code into the panel at the bottom of the stairwell.
The main quest step changes to
Anger and Bargaining.
13. Anger and Bargaining - Find the portals and complete challenges
![Red and blue portal/orb in docks]()
The lighthouse is now pointing it's red light to an area of the map. Find the location and use your shield to shoot the red and blue portal. It should stay visible outside of spectral vision.
Depending where the portal spawns, the steps to progress are slightly different. See below:
- Dock
- Shock the portal to activate the morse code clicker in the Wardens Office (on the same desk where acid part is behind the locked door). Whilst random attempts have worked it's best to brute force this step because of the number of possible combinations. Start with either a long or short beep, if Warden Laughs, the long or short you just entered is wrong. Use trial and error to work out whether next click is long or short by restarting the process.
- Next kill a zombie in the room with the skeleton body on the table. Use shield vision to look for the ghost that spawns in. Have all players hold square on the ghost then fill the ghost with a few souls before escorting the ghost through the prison and downstairs to the Dock. If done correctly, the ghost uses the portal to reach the boat (which has moved very close to the dock now).
- Power Room
- Use shield vision to see the ghost electrician who has spawned into the Power Room. He moves between different levers, important for later.
- Go to Building 64 in Dock. Interact with sparking generator and play 5 games of Simon Says on the monitor.
- IMPORTANT. When the 5th game ends watch VERY carefully for the 3 machines where the lights stay on. Write down the logic symbols on these machines. You've only got about 5 seconds for this so don't mess it up!
- Get the punch card from the shelf with the candles on. Take card to room above spawn, insert into computer in corner to light up the 6 monitors.
- Interact with each monitor to flick between the two symbols displayed. These are your matching symbol pairs so write them down.
- The key now is to match a symbol from a machine that was lit (in Building 64) with a symbol in Power Room. Use the matching pairs you wrote down to determine this.
- Return to Power Room, wait for the electrician to move to the right symbol and shield blast him. He should pull the lever.
- Do this for all matching symbols
- Showers - a ghost spawns playing a banjo. Interact with the ghost to take the Banjo and blue rings of fire appear on the floor. Stay in the ring as it moves and get kills.
- Outside Wardens Office (Michigan Avenue) - after activating portal find ghost in cafeteria, now escort the ghost to the portal without it taking too much damage.
- New Industries (near dog head) - after shocking the portal, find the ghost inside the prison (usually library) and shield blast him. Follow the ghost as he moves through the prison towards New Industries, he will morph between the spirit realm and the real world. The solution is to stop the ghost murdering his victim by constantly Spirit Blasting him and draining him with the shield key. He should eventually turn red and then you can use the Trap in New Industries to kill him. Tip: try and block the ghosts path by standing in front of him. It takes 6-7 blasts to complete this step.
At the end of each portal a red gem will drop, pick it up and insert into the map in Richtofen's Lab.
After you pass (or fail) a challenge, return to the electric chair and use the shield again to look for a new code. Enter the code in the Citadel Tunnel panel and find the next portal.
14. Reflection and Loneliness - BOSS Fight
![BOSS fight]()
Congratulations you have completed the steps leading up to the BOSS fight. Look to the sky and you should see red steams all originating from the portals. Return to the Warden's House and interact with the electric chair body. The Summoning Key will spawn in - have all players stand in front of the chair.
Watch the excellent cutscene and then prepare yourselves for the final BOSS fight. Once free from the jail cells remember to collect your weapons from the bag on the floor outside the cells and get a new shield. Then follow the blue bird through the prison all the way to Richtofen's Lab. A warden will spawn outside of New Industries but is attacked by Sal, Finn and Al's ghost. Wait for the Warden to fly off, pick up the orb and place it on the map with the other red gems. The map burns, showing another cryo pod and a secret room opens above spawn. Have all players stand on the buttons to be teleported to the BOSS fight.
The BOSS fight takes place in an open area and it's a relatively straight forward fight. Kill zombies until the warden appears then stand in the red area and aim for the red orbs in the sky. Shield blast the orb on the machine. Repeat this process 3 times and then Richtofen needs to sit in the chair. The Richtofen player gets a special cutscene before rejoining the fight.
Ending Cutscene![Ending cutscene]()
Completing the BOSS fight rewards all players with the
Most escape alive trophy.
I won't spoil things but the ending for Blood of the Dead is probably the best in COD zombies history!
Note: The EE is complete. This guide will be updated with any corrections and improvements in the coming days. Thanks for joining the hunt and major congratulations to AmiralBahroo, Giantwaffle and their team for worlds first.