Dead of the Night Zombies - ALL Easter Egg Steps
Posted in
black ops 4
Welcome to the Easter Egg guide for Dead of the Night, the first DLC zombies map for Black Ops 4. This guide contains a detailed walkthrough for the main EE including screenshots and puzzle solutions to guide you through.
If you're interested in other small Easter Eggs such as the Wooden Stake Crossbow, see the
side Easter Eggs guide.
Treyarch decided to release DLC 1 without any warning this year. No trailer, promotions and not even a hint of a release date. The lucky guys "down under" (Australians) got their hands on DLC 1 first thanks to a surprise release on the PS4 store that no one saw coming. The popular YouTuber's, such as NoahJ, Dalek and Pizza, didn't get invited to an early play session this time which is great news for the EE hunt.
Dead of the Night follows the new Black Ops 4 Chaos crew as they enter a haunted mansion. Things soon turn into fight for survival as zombies, vampires and even giant werewolves takeover. The new map is beautifully decorated, with a large indoor Mansion area comprising of a Wine Cellar, Music Room, Smoking Room, several Balconies, Staircases and Main Hall. The darker outside area contains a mysterious Forest (where the PaP machine is first located), a Cemetery and Mausoleum.
SOLO Update: Players will be pleased to know that this EE is entirely possible SOLO.
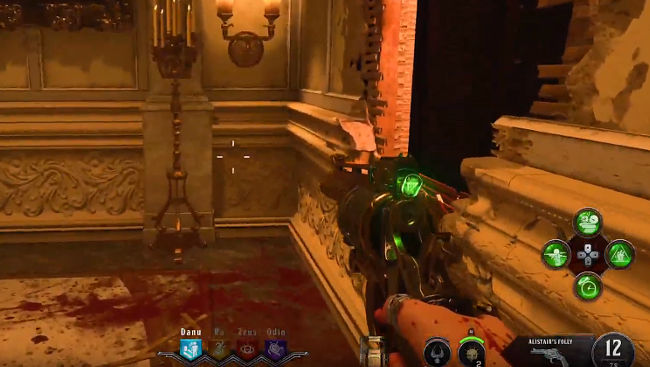
Like the other Black Ops 4 zombies maps, there are many parts to collect in Dead of the Night. In total, the inventory screen shows 9 slots for collectible parts/items, split into three rows of three. It's not certain that every part is a collectible item because we know some come as rewards for a series of steps or milestones e.g. turning on power in older maps.
EE Trophy/Achievement
![Main EE trophy]()
Dead of the Night has a main EE achievement which requires plays to clear out the evil within the Mansion. We expect that this EE concludes with a final BOSS fight and cutscene.
Trial by Ordeal
In Dead of the Night, defeat the evil within.
Inventory Items
![Inventory items]()
The image above provides a glimpse at the inventory screen for Dead of the Night. As you can see there is a sulfur part, vampire poop, charcoal and three circular tabs with red gems in the middle (which are used for activating the traps). The inventory changes as you progress through the EE and be prepared to collect a lot of parts for this map.
ALL Easter Egg Steps
1. Unlock PaP
After interacting with the artifact (on Grand Staircase) there are several steps required to unlock PaP.
1. Charge Crystals![Green crystal]()
Locate each of the coloured Crystals on the map and kill zombies in close proximity to collect their souls. The Crystal locations are shown below and you must knife the jar to reveal the Crystal inside:
- Master Bedroom - end of the bed on table
- Study - table between two chairs
- Library - on the desk right of statue
- Wine Cellar - center of room, on table
- Wine Cellar - on wooden box with candles
- Trophy Room - in front of fireplace on table
- Bedroom Hallway - in front of couch on table
Once the Crystals are charged, move on to the next step.
2. Get the Tuning Forks![Painting and ghost]()
Interact (Gaze) with the charged Crystals and you’ll see a teleport animation leading to a particular object such as clock, painting etc. Find this particular object on the map, for example the Clock is in the Billiard Room whilst the Painting is in East Gallery and the Noose is in the Wine Cellar. If you interact with the correct object, a challenge will start.
Object locations- Woman Portrait - Music Room
- Clock - Billiards Room, Main Hall or Dining Room
- Doll - Entrance Hall
- Noose - Wine Cellar on the back of a chair
- Scroll - Study (on bookshelf near cemetery)
- Maid Painting - Tea Room
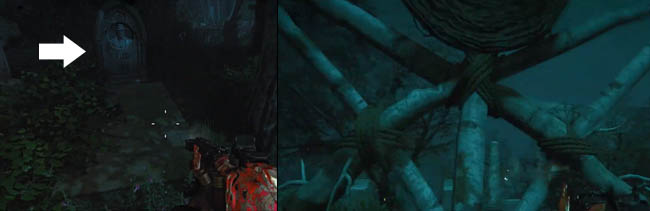
ChallengesChallenges are random. Sometimes a ghost will appear after you interact, which you must now follow through the map. Usually this ghost will lead to the cemetery and a particular gravestone. Once you make it to the ghosts final destination, pick up the Tuning Fork and use it to open the passageway (in Forest Terrace) leading to the Forest and the PaP machine.
Other challenges include a ritual symbol beside the object, stand in the circle and kill zombies whilst inside, or kill all Vampires that spawn into the area. At the end of each challenge, a Tuning Fork is yours to keep.
Once you have collected THREE Tuning Forks you can fully open the entrance to the Forest and PaP.
2. Build the shield
![Shield]()
Although the shield isn't required just yet it's worth getting it early, especially if you're playing SOLO and need to hold a zombie close by. There are THREE parts required, with each part having three possible spawn locations. A good workbench to complete the build is in the Smoking Room.
Shield part locations- Main plate - East Balcony (by wall buy), Grand Staircase (near balcony) or West Balcony (near wall buy)
- Shield Window - Study (on table), Library (on chair), Library (on shelf)
- Counter Plate - East Hallway (on chair), Dining Room (left of door to Greenhouse), Dining Room (near staircase)
3. Get Alistair's Folly (Wonder Weapon)
The maps new Wonder Weapon is called Alistair's Folly and it's a revolver sized Ray Gun weapon that shoots green plasma bolts. The weapon can be acquired very early in the game by interacting with the mystery box or completing a short puzzle for a FREE version.
How to get the FREE Wonder Weapon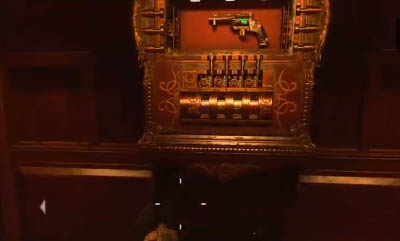
Within the vicinity of the FOUR perk machines is a small coloured symbol (red, green, yellow and blue), often outside of the map. Locations are:
- Blue symbol - Cemetery or Mausoleum
- Green symbol - Greenhouse Terrace or Gardens
- Yellow symbol - Forest Terrace
- Red symbol - Master Bedroom, East Gallery, Wine Cellar or Dining Room
Take note of each of these symbols and return to the Library. Enter the codes into the machine below the wall weapon version of the Alistair's Folly. If done correctly, a notification sound will confirm your reward and you can now pick up the weapon for free.
4. Collect parts for Silver Bullets
The Silver Bullets are used for killing the giant werewolf, revealing yet another piece of the Easter Egg. To craft the Silver Bullets you must find SIX parts and take them to two workbenches/machines, the first of which is in the Wine Cellar.
Silver part locations:- Silver Trophy - Dining Room or Library (by sofa)
- Silver Candle Stick - Entrance Hall (on a table), Billiards Room or Wine Cellar
- Silver Plate - Wine Cellar
At the Wine Cellar workbench you can craft molten silver from these parts. Once crafted, the middle inventory row (which previously showed the Silver parts) will be replaced by a single item - "Molten Silver".
Additional part locationsThe next three parts are required to craft the final Silver Bullets. Take them to the workbench in the Library.
- Charcoal - Main Hall by the fireplace (or any fireplace)
- Vampire Poop - Cemetery, in corner opposite mystery box
- Yellow crystal - Greenhouse Laboratory, on the table by the books
When ready, equip the Silver Bullets into your favourite weapon. Now wait for a Werewolf to spawn and use the Silver Bullets to kill him. The wolf will drop a new item called
Werewolf Chaos Material.
5. Create Prima Materia
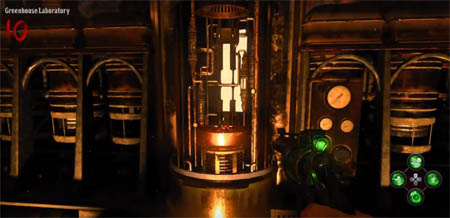
Take the newly acquired item from the dead wolf and return to the Greenhouse Laboratory and place in the large machine in the middle of the room. Wait a few seconds for the machine to process the material and then pick up the new Prima Materia item.
6. Start WW upgrade process and get Chaos Theory
![Hidden bookshelf room]()
To start the first upgrade process for the WW (Chaos Theory) you must find an extra part which is hidden.
Go to the library and shield bash (melee) the book with the gold symbol on. This book is on the bookshelf shown in the image above. If done correctly, a secret room will open with a new part inside. Pick it up.
Return to the Greenhouse Laboratory crafting table (with the pot on it) and craft the sludge before completing the upgrade at the other workbench close by. You should now have an upgraded WW called the
Chaos Theory.
7. Collect bile and kill Crimson Nesfaratu special vampire
Using your newly upgraded WW, kill vampires with CHARGED shots. Each vampire should drop yellow Vampire Bile - collect 4 of these. Now go to the glowing red gravestone behind where the scarecrow appeared earlier in the Cemetery and interact from behind. A special vampire should spawn in called the "Crimson Nesfaratu" who is covered in blood. Kill this guy and collect the new piece
Nesfaratu Chaos Material for the Easter Egg.
8. Get Bat Chaos Material
![Flying vampire bat]()
Find the lights (lanterns) on the Mausoleum stairwell area that are turned on. Shoot them with the WW to turn them off (the order is important) and you have about 90 seconds. Each time you shoot the right lantern, a new one will light up, hit that one next. Repeat for FIVE lanterns. Having several players spread out makes it easier to spot which ones are turning on next. There's a slight difference in the colour of these lanterns, they're slightly orangey rather than yellow.
When all lanterns are turned off in the correct order, a large vampire bat will spawn from the final light and fly up into the sky. Follow and shoot this bat (possibly with Chaos Theory WW or Silver Bullets) and he should head down to a particular lantern and disappear again, leaving a new part on the floor called
Bat Chaos Material.
9. Complete the 2nd WW upgrade (Alistair's Annihilator)
![Dirt pile in forest]()
You're one step away from the 2nd upgraded version of the WW.
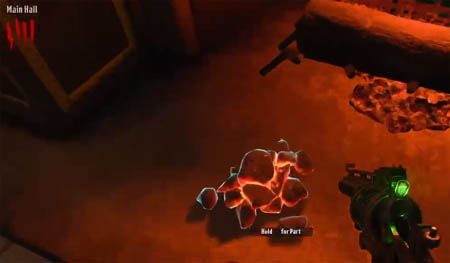
Return to the Forest and note the dirt piles that are spread around the floor. Using CHARGED shots, kill zombies with the green Chaos Theory near these dirt piles. Zombies should dig up the piles and one of them contains the final part.
Go to the Greenhouse Laboratory again, activate the machine to craft the Prima Materia and wait a few seconds before collecting. Finally, use the crafting table in the Greenhouse Laboratory to complete the Alistair's Annihilator upgrade.
10. Effigy stone slab
This is the first of three stone slabs which you must collect to unlock the door to the final BOSS fight. Interact with the coloured crystals again (the ones you charged for opening PaP) and you should see one of the following three images: knight, circular object and pile of twigs. In this step we're going to focus on the sticks...
First, shoot several tree branches (x 5) in the Cemetery to collect Sticks. These tree branches should be fairly obvious because the in-game model for these branches is distinctive compared to other trees and leaves will fall off the branches which is a big clue. Hold square on the sticks and they will fly away and move to the scarecrow location.
Next, find your characters grave in the Cemetery and interact. If playing with several people, it's the player who has 1912 written on the grave. An audio quote will play from your character if done correctly.
Using the upgraded WW (Annihilator) CHARGE shoot the ground in front of the scarecrow. The ground should light red to signify it's on fire. The player who is in spirit mode (after interacting with gravestone) should interact with the scarecrow to die. This player enters afterlife mode if done successfully. The player is now invisible to their teammates.
Finally, this afterlife player must find the ghost woman who has spawned inside the mansion. Escort the ghost back to the scarecrow until she catches fire, dropping a stone slab on the floor. Interact with the stone slab and you'll be spawned back to the real world. Have players interact with the slab and you're now locked in the Cemetery for a defence challenge. When complete, collect the stone slab from the spawn area.
TIP: You could leave the defence challenge for each of the stone slabs until the BOSS fight. Strategically, this gives you more time to get the other rudimentary steps done before preparing for the defence challenge e.g refilling ammo, buying perks etc.
11. Telescope stone slab
![Align the light]()
First, aim and shoot the electric pole on top of the Mausoleum building in the Cemetery. If playing with several people you must ALL shoot at the same time, possibly with a PaP weapon (unconfirmed). This should electrify the pole and direct the light to the atrium, at the crystal above the Atlas statues head.
Now head to spawn (North Atrium Bridge) and interact with the 3 dials to rotate the rings and align the focusing stone so it lines up with the lights. Each dial will rotate one or more rings, understand this mechanic to help you solve the puzzle. The light should be reflected through to the end of the room, not the roof or walls. There's a bit of fiddling for this step. If done correctly, the crystal should break and the light will shine through to the Laboratory. You can now interact with the symbol dial in the lab.
The upstairs machine in the lab has a dial on the front with many symbols. Players can interact with the dial to spin and then melee (knife) to choose a symbol to select. To complete the lab dial puzzle you must find the correct Zodiac symbols around the map AND also the scratch marks in the same room as the symbols.
Below is an example, of a zodiac symbol and scratch marks:
![Zodiac symbol and scratch]() Zodiac symbol locations
Zodiac symbol locations- Entrance Hall - left of Danu statue, under the table without the doll
- Billiard room - by the side of the pool table
- Billiard room - under the chess board table
- Wine cellar - lower shelf of wine rack
- Library - behind Egyptian statue/mask
- Trophy room - next to the window, behind the lamp
- Study room - on the wall by the stairs
- Dining room - broken pillar on the door leading to Greenhouse
- Main Hall - behind candle stick, to the right of stairs
Each time you find a symbol, look in the same room for the scratch marks. There might be several marks so add up the number of scratches to get a total for this symbol. The number of scratches is important to determine the order.
When you have found THREE zodiac symbols (and their scratch mark tallies) enter them into the lab machine in the order of LOWEST to HIGHEST scratch marks. Note, symbols will change if the sequence is entered incorrectly. If done correctly the telescope will start moving and the symbols remain visible above the dial.
Next, pull out your shield and interact with the dome crank to open the ceiling dome. When fully open, shield bash the crank to keep the ceiling open permanently.
Finally, activate the electric trap in the Greenhouse Laboratory and capture the electricity in your shield. Bash the telescope (all players must do this at the same time) and a beam of light should shoot up into the sky and the screen goes white. Go back downstairs and underneath the telescope platform is the stone slab. Interact and complete the defence challenge to claim the stone slab.
12. Knights stone slab
![Knight statue]()
Using an Energy Core (common circular collectable, bottom row of inventory) place it in a fire trap e.g. at the Mausoleum or Library.
Activate the fire trap, then shoot the sides of the trap with the Annihilator Wonder Weapon. It should turn blue. Walk through the blue flames with your shield out to ignite the shield in blue fire. Now find any fireplaces which are NOT lit and use the shield to light them blue. There are THREE sets of FOUR fireplaces so you need to repeat this step three times (or more if you run out of time).
Fireplaces may be random but this sequence worked for me:
- 1st Set: Smoking Room -> Library (RHS) -> Library (LHS) -> Billiards Room
- 2nd Set: Main Hall (RHS) -> Near Spawn -> Main Hall (LHS) -> Next to Tea Room
- 3rd Set: Trophy Room -> Master Bedroom -> Music Room -> Dining Room
Be quick and if you light the wrong fireplace it will not stay lit. Order is important too. You must repeat this fire lighting process THREE times, one for each of the sets. At the end of a set, pickup the gem from the last fireplace.
Next, interact with the Knights chests (see image above). Locations are:
- Cemetery - RHS as you go in
- Main Hall - in the hallway
- Greenhouse - near perk machine
The statues will disintegrate, leaving a glowing orb (blue, green etc.). Escort the orbs through the mansion and into the Forest. Ensure the correctly coloured orb goes to the correct symbol on the floor. e.g. in the image above, the blue orb must be escorted to the blue symbol on the floor. Remember, stay close to the orb or it will stop moving.
If done correctly, the symbols will transform into blue holographic knights. These are soul boxes so kill zombies (x 10 per knight) nearby to charge each of them. Eventually the knights will start to move towards PaP and werewolves will spawn in. Kill a werewolf (use Silver Bullets to make it easier) in the triangle formed by the knights and the stone slab should drop.
Interact with the stone slab and complete the defence challenge once more.
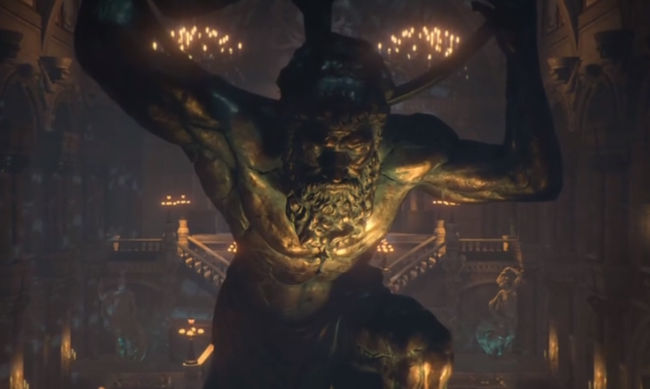
13. BOSS fight
![Werewolf boss fight]()
Make sure all players are armed to the teeth and with Monkey Bombs if possible. Interact with the stone door (with blue symbols on it) in the Forest to be teleported to the final BOSS fight area.
Phase 1There are 3 statues around the BOSS arena, each one holding a crystal. Rotate the crystals towards the green tile, so that the crystals change from white to green. The wolf should chase someone whilst underground - use this opportunity to lure him into the green tile and the wolf will appear. At this point open fire with your strongest weapons. Repeat this process until he jumps away.
Phase 2In phase 2, simply survive until the final 3rd phase starts.
Phase 3The final phase is the same as the first, expect this time the green tile is hidden. As before, turn the crystals until they light up green and then the green tile will appear. Again, unleash your strongest weapons when the wolf appears.
Ending cutsceneSuccessfully surviving the final phase and inflicting enough damage on the wolf will end the Easter Egg. Congratulations, you have completed the main Easter Egg for Dead of the Night and can enjoy the ending cutscene!!
Many congratulations to SmartGuy, Milo and their team for achieving a worlds first (streamed) Easter Egg for this map.
The EE hunt is now complete. This guide will be edited to improve steps and provide additional information. Thanks for joining us on this DLC 1 EE hunt and see you soon for DLC 2.If you're interested in other side Easter Eggs including the secret song, free rewards, or the second Wonder Weapon called Savage Impaler, see the
side Easter Eggs guide.