Rave in the Redwoods - All Easter Egg Steps
Posted in
infinite warfare
Rave in the Redwoods is Infinity Wards first DLC map for Infinite Warfare and like it's predecessor, it has a secret Easter Egg for players to discover. In this guide you'll find a complete step by step walkthrough, helping you solve many of the puzzles and tasks as you work your way through to the end of the zombie infested rave.
If you're interested in
side Easter Egg's then check the bottom of this page.
Thanks to Lee Ross, what we do know about Rave in the Redwoods is that it contains an ending cutscene (outro) this time around, with clues pointing to the location of the next DLC zombies map in the series. This is in contrast to Zombies in Spaceland, which although had a great Easter Egg (and BOSS fight), it didn't have an ending cutscene to enjoy for your efforts.
In addition to the multi-step EE, Rave in the Redwoods also features several unique weapons: the Crossbow, Golf Club, Machete and several others. You can learn how to get the amazing Crossbow Wonder Weapon in my other guide, but let's just say for now that you'll want this weapon to help you out! We also know that the map includes a Rave Mode called Rave Vision, which directly effects the new slasher BOSS zombie who changes form depending whether you are in or out of Rave Mode.
Much like the afterlife mode from Mob of the Dead and the margwa mode from Shadows of Evil, players can enter Rave Mode to solve EE clues. Throwing pouches into the bonfire increases the Rave Vision effects and thanks to the "Hallucination Nation" achievement we know you can stay in Rave Vision for quite a long time.
Behaving similar to your typical drug it does have hallucinogenic effects on your character, which in turn reveal new clues around Bear Lake, opening the door for further Easter Egg clues and steps. However, it's not a time to relax as the more aggressive version of the Slasher will come to fruition during this mode so be wary!
Thankfully, many fans will be pleased to know that
this EE is soloable. However, it's certainly a tighter map compared to ZiS, darker and with more hazards than before. The Flogger trap returns to provide a decent protection mechanism whilst zip lines form an escape route in desperate times. Lee hinted that to get the Wonder Weapon we'll need to work "really hard" and considering there's no starting pistol, players must scavenge right from the start.
EE Achievement
![EE achievement]()
Every EE in the zombies series is associated with an achievement/trophy and Rave in the Redwoods is no different. Although the final EE achievement directly relates to the soul key, we can guess that the following will all play a part:
- "Locksmith" - recover a piece of the soul key
- "Scrapbooking" - complete all of the Photo Collection and Momentos
- "Top Camper" - earn all of the camp badges
All Steps
1. Turn on the Power
Turning on the power will open up the entire map, power the perk machines and other important features. See the Power guide for details on traversing the map and reaching the generator room to flick the switch:
Power tutorial2. Repair the Boat and Projector
Finding the boat parts (propeller), repairing the boat and reaching Turtle Island will get you one step closer to opening the portal and using PaP. See the PaP guide for more information on these two buildables and opening the portal:
PaP tutorial3. Speak to Kevin Smith
Whilst in the projector room, interact with the radio to talk to Kevin. He'll give you a hint that starts the first official step of the Easter Egg.
4. Collect Photos and Complete the Rituals
![EE - Ritual Step]()
The fourth photo in the inventory screen is comprised of several smaller "dirty" pieces, each one with a different persons face on it. Collect each of the photo pieces and complete the associated ritual for it (one by one).
Photo Locations- Photo 1 - Upper level in rave area (Recreational area), on the floor.
- Photo 2 - Upstairs from spawn, on balcony outside from Jug room.
- Photo 3 (skull) - In the generator room where the power switch is, on the floor by wheel.
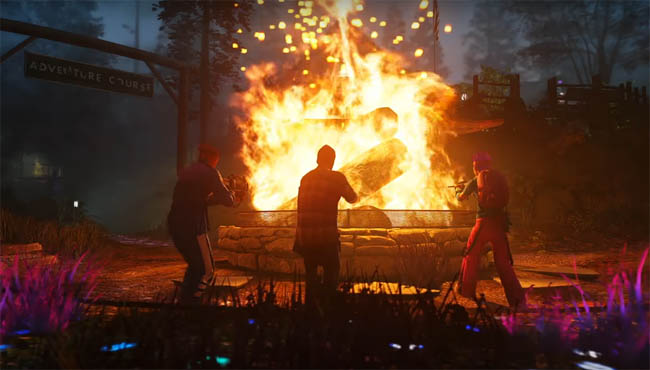
Ritual Locations- Ritual 1 (Arm shots/Crawlers) - Adventure Course - beside bonfire (where yellow tents are)
- Ritual 2 (Explosive kills) - Main Rave area (Recreational area) - in front of Quickies perk machine
- Ritual 3 (Headshots) - Bear Lake, in front of the Bang Bang machine
Once at a ritual area, interact with the floor (where it says "hold to place item") and an unlimited Rave Mode will begin. Kill zombies in close vicinity to the ritual area and zombie hands will appear from the floor. Successfully killing enough zombies and the slasher will end the ritual.
Pick up the item he drops (Soul) and the photo piece in your inventory is now cleaned.
Important - Wait a round between each photo and speak to Kevin in the projector room, then repeat the ritual step above for each of the photo pieces and ritual locations.
5. Press Red buttons
Head back to the generator room (power switch). Every player must interact with a red button with a white light above it, simultaneously.
6. Fight Kevin Smith (BOSS Fight)
![EE - Kevin Smith fight]()
After the third ritual above, Kevin Smith disappears from the top floor of the projector room and he reappears in the boat by the lake when you press the red buttons. Take the boat (from docks) with the rest of your team and await the cutscene. Kevin will fall out of the boat and a massive brute BOSS spawns in.
7. Fill the Souls
![EE - Fill the Souls]()
Players are now teleported to an enclosed area together with regular zombies and the BOSS brute. Avoid the BOSS whilst each of the team kills zombies close to the blue soul balls. Successfully killing zombies close to a ball will collect their souls.
Continue this process until each of the Soul balls is full and it shines a light down from above.
8. Kill the Boss with tether trap
![EE - Boss Phase 2]()
During the second phase of the BOSS fight you must tempt the brute into the blue circular totem on the floor. This is like a tether trap that traps the BOSS for a few seconds.
Whilst trapped use your strongest weapon, Crossbow is wise, to inflict maximum damage to the BOSS, aiming at his weak blue body part.
Rave mode turns off following this stage.
9. Kill BOSS outside of Rave Mode
![EE - Boss Phase 3]()
Next, the BOSS will have certain hit markers on his body to signify his weak points. These little blue balls look similar to the soul balls you collected earlier. Again, use your strongest weapon to hit the BOSS's weak points until he goes down.
10. Green Circles / Skeletons
![EE - Boss Phase 4]()
The next phase of the fight contains green circles and skeletons. Players must stand inside their own green circle and fend off the zombies.
The above phases will now repeat a couple of times: soul collection, tether, hit marker etc.
Lastly, one final phase exists where the BOSS takes regular damage, simply unload as much as possible to kill him off. The Soul Key piece is dropped on the floor.
Ending Cutscene
![EE - Ending Cutscene]()
Congratulations you have completed the main Easter Egg! The final cutscene now plays, revealing that the next zombies map for Infinite Warfare will take place in the 70's era.
Side Easter Eggs
Play as Kevin Smith
![EE - Play as Kevin Smith]()
Once the main Easter Egg is complete, the guest character "Kevin Smith" is available as a playable character. Enter the code shown below whilst on the main zombies menu, the same as you did for playing as the Hoff in Zombies in Spaceland.
RIGHT, LEFT, LEFT, DOWN, DOWN, RIGHT
Get the Slashers Weapon (Chainsaw)
Another excellent secret weapon, on par with other Wonder Weapons, the chainsaw is available once you beat the main Easter Egg. It's found in the generator room (power switch room) right next to the knife throwing table (where the dead body is attached to).
The chainsaw is effective at high rounds and even has it's own related achievement:
Tables Turned - In Rave in the Redwoods, kill the Slasher with his weapon.
Secret EE Song
![Purple Wisp]()
There are 10 purple wisps that need to be hit in rave mode. Starting from the spawn location, activate Rave Vision using the fireplace and then follow the steps below:
#1 Look straight up on ceiling.
#2 Go upstairs, wisp on right by sofa.
#3 Through next room, go prone, under table next to pool table.
#4 Behind kitchen counter (same room).
#5 Outside balcony on left, look up at cabin roof.
--Jump off the balcony to street level, top up Rave Vision.
#6 To the right of the house entrance, on garage roof (tricky to spot).
#7 Inside house, under PC desk behind computer.
#8 Enter Tuff Nuff room (top floor of spawn cabin), behind boxes on the left (tricky to spot).
#9 Same room, opposite side, go prone and check under clothes rack (where boat part is).
#10 Same room, corner besides Tuff Nuff machine (tricky to spot).
--1000 XP should pop up to signify done correctly. Song now unlocked in main menu.
This guide will be updated with any newly discovered secrets